How to Crochet a Laptop Sleeve – Easy Pattern for Beginners
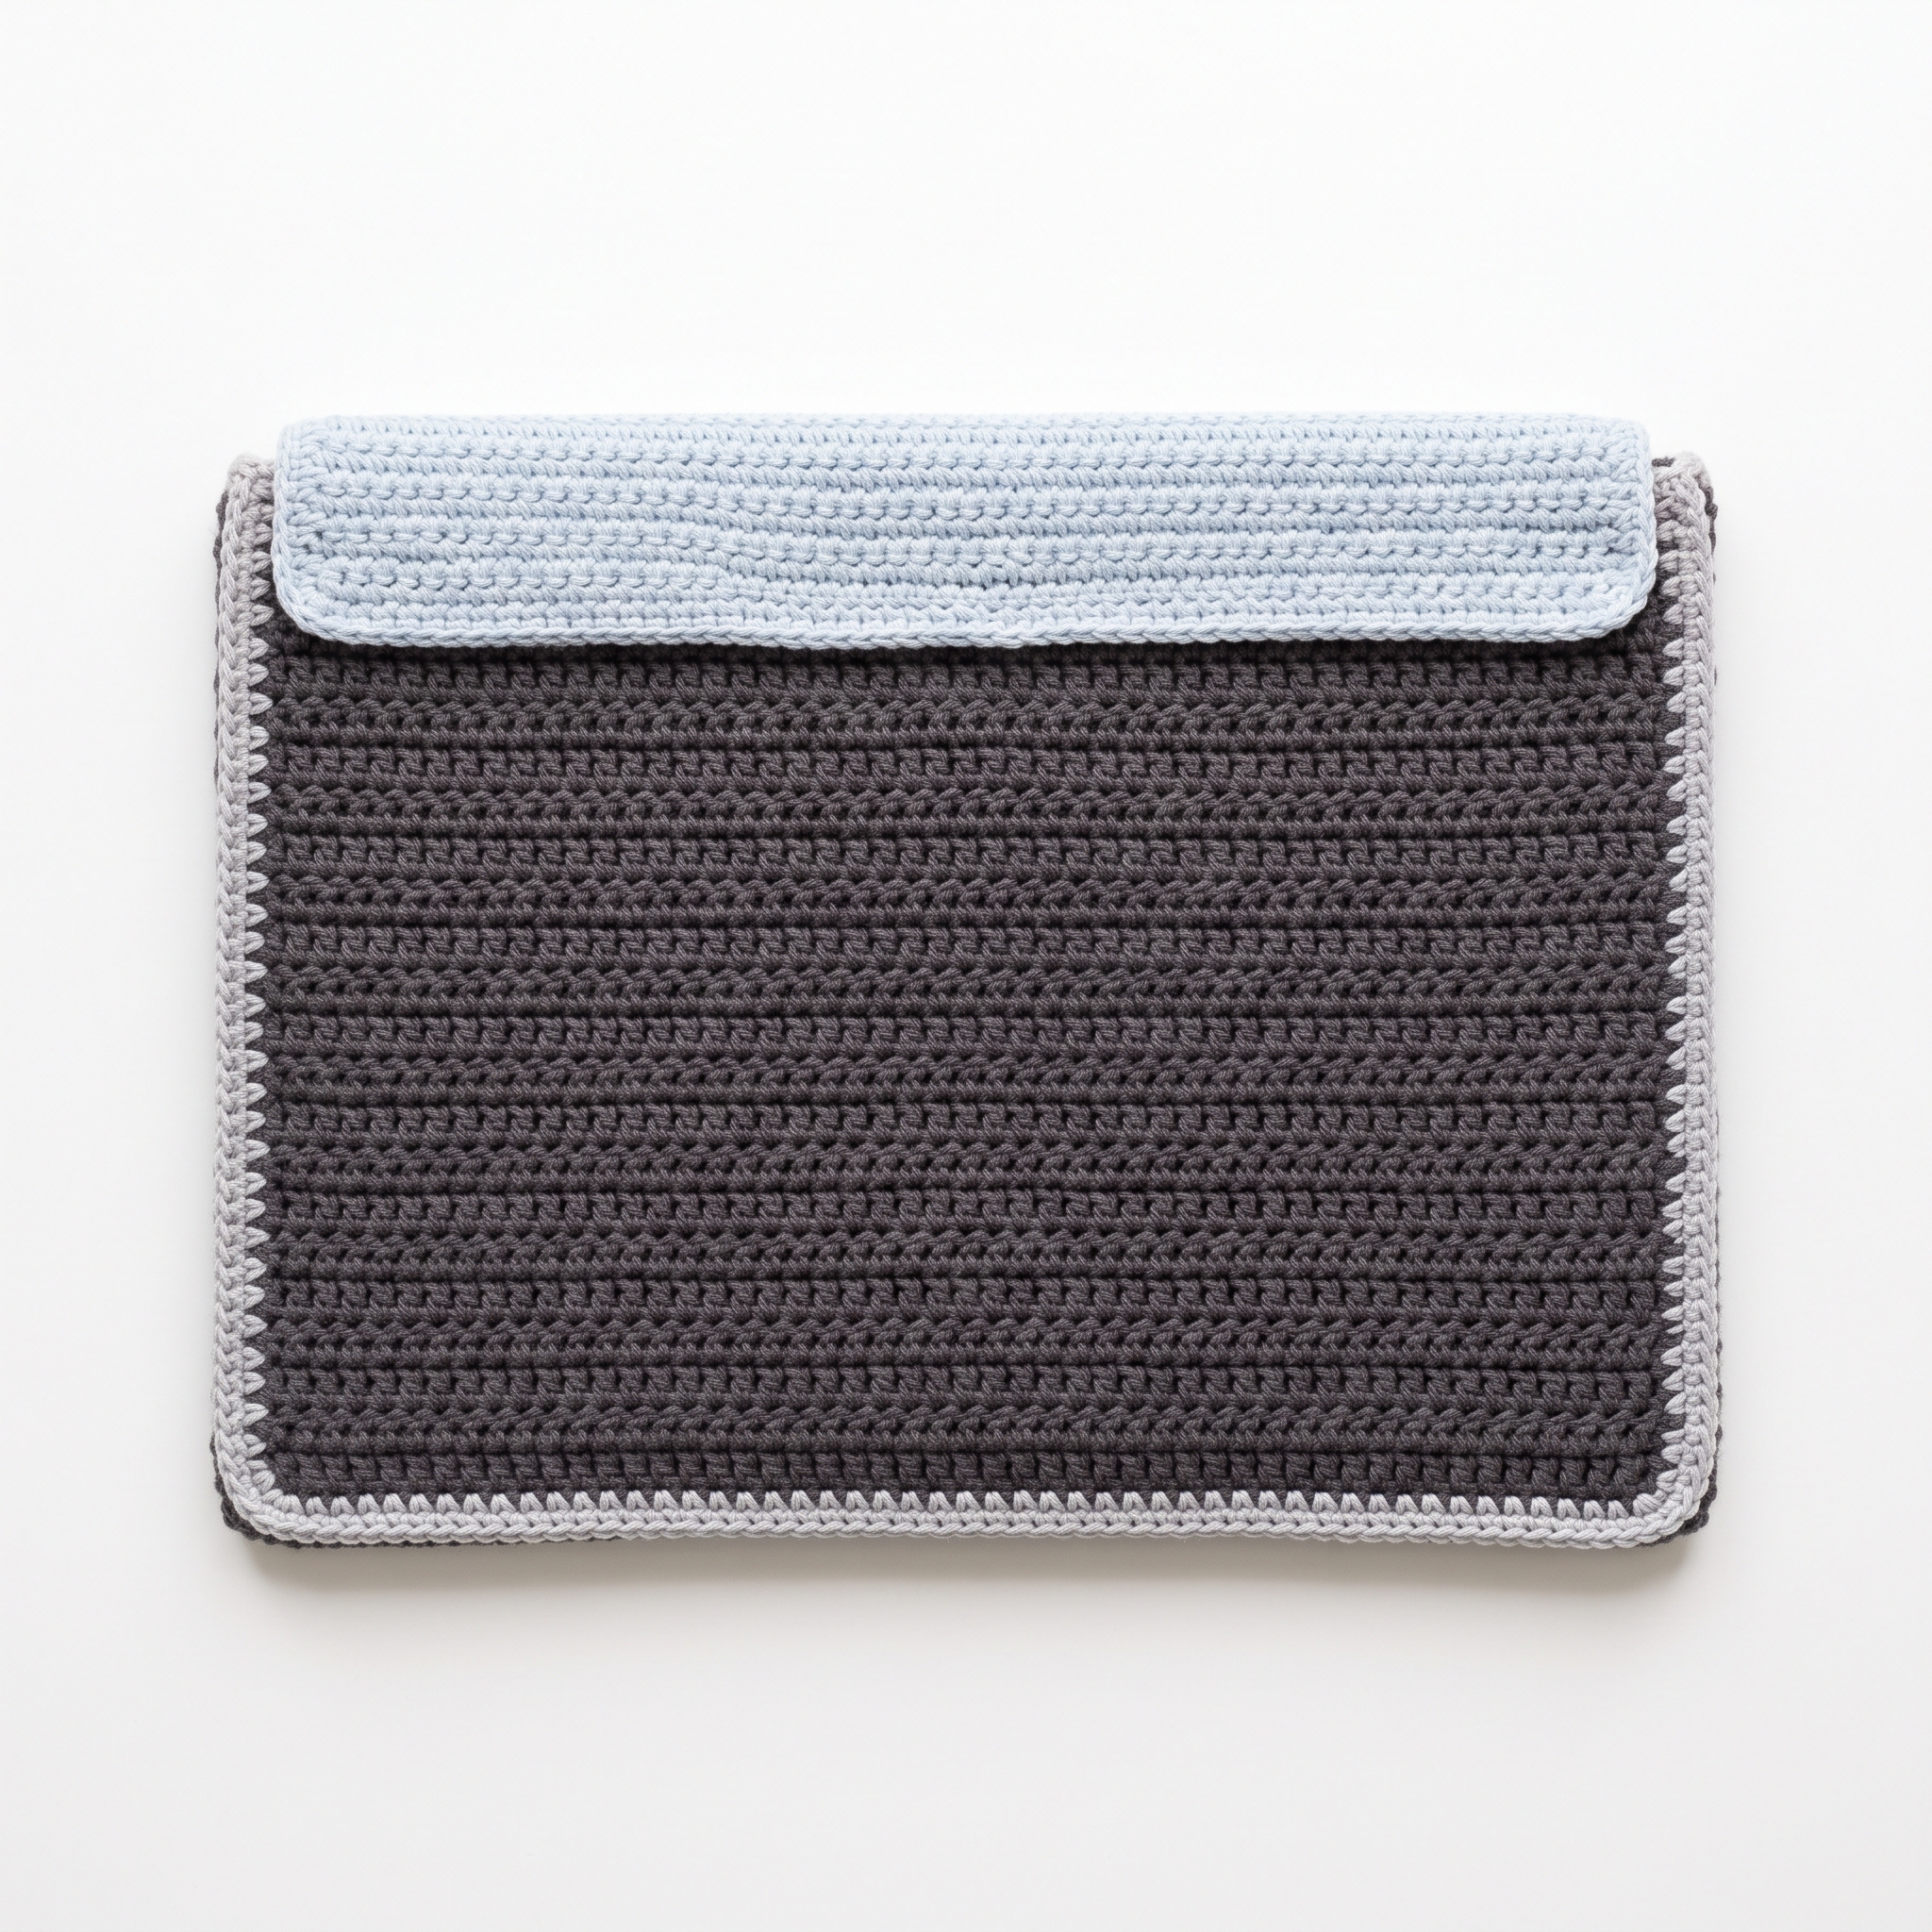
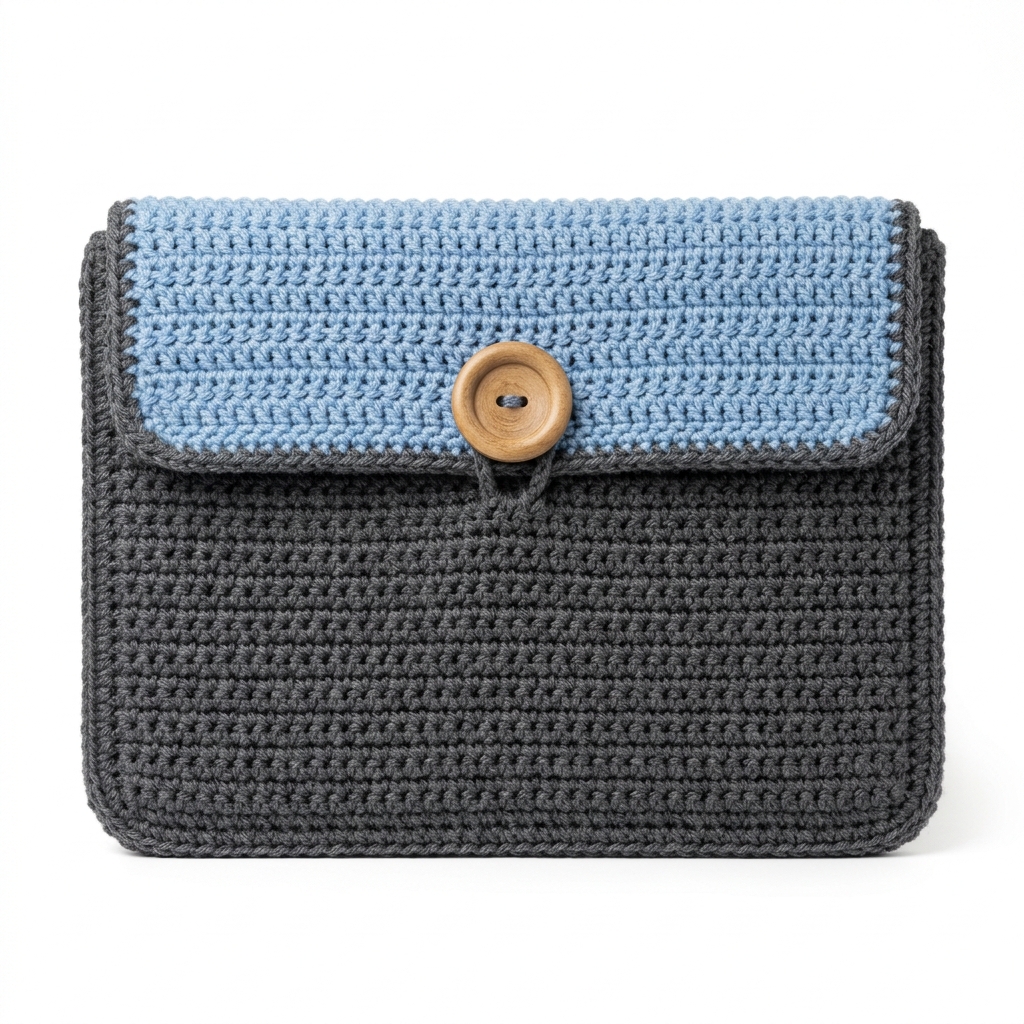
In this blog post, I'm excited to share how to make a cozy and stylish crochet laptop sleeve with a lovely button flap! This project is beginner-friendly, and I'll walk you through every step of the way, so don't worry if it's your first time crocheting.
Published October 5, 2026 · by Lina
- Skill level
- Beginner
- Yarn weight
- Worsted
- Hook size
- 5.5 mm (I-9) hook to create a nice, sturdy fabric.
- Time
- Approximately 4 hours
In this blog post, I'm excited to share how to make a cozy and stylish crochet laptop sleeve with a lovely button flap! This project is beginner-friendly, and I'll walk you through every step of the way, so don't worry if it's your first time crocheting.
HERO IMAGE PLACEHOLDER
WHY YOU'LL LOVE THIS PATTERN
This laptop sleeve is a fantastic beginner project because it consists of basic stitches and only a few parts to assemble. You can expect to complete it in a few hours, and it provides both protection for your laptop and a personal touch to your tech gear!
TABLE OF CONTENTS
- What You’ll Need
- Stitches You’ll Use in This Pattern
- Pattern Details
- Abbreviations
- Special Stitches
- Let’s Get Started: Full Pattern Instructions
- Assembly / Putting It All Together
- Finishing
- Full Recipe-Card-Style Summary Box
- What’s Next?
What You'll Need
- Yarn: Worsted weight (medium thickness) yarn is used for this project. You will need:
- 200 yards of Charcoal Gray (Color A)
- 50 yards of Soft Blue (Color B) for the flap
- Crochet Hook: 5.5 mm (I-9) hook to create a nice, sturdy fabric.
- Stitch Markers (optional but helpful): These help keep track of where you are in your project, especially if you're working on multiple sections.
- Scissors: For cutting yarn.
- Yarn/Tapestry Needle: This is a needle with a large eye used for weaving in ends and sewing pieces together.
- Buttons: 1 large button, about 1-1.5 inches in diameter to secure the flap.
Stitches You'll Use in This Pattern
- Chain (ch): This creates the little loops to start your work. To do this, make a slip knot, then pull the yarn through the loop on your hook the desired number of times.
- Single Crochet (sc): Insert your hook into the stitch, yarn over (wrap the yarn over your hook), pull through so you have two loops on your hook, yarn over again and pull through both loops.
- Slip Stitch (sl st): To sew pieces together or join rounds. Insert your hook into a stitch, yarn over, and pull through both the stitch and loop on the hook at the same time.
- Double Crochet (DC): Yarn over, insert your hook into the stitch, yarn over again, pull through (you should have three loops on your hook), yarn over, pull through the first two loops, yarn over again and pull through the last two loops.
- Increase (inc): This means making two stitches in the same stitch.
- Decrease (dec): This means working two stitches together to create one smaller stitch.
Pattern Details
- Skill Level: Beginner
- Finished Size:
- Small: 13” x 10” x 1”
- Medium: 15” x 11” x 1”
- Large: 17” x 12” x 1”
- Time to Complete: Approximately 4 hours
- Yarn Amounts:
- Charcoal Gray (Color A): 200 yards
- Soft Blue (Color B): 50 yards
- Terms: This pattern uses US crochet terms.
Abbreviations
- ch = chain
- sc = single crochet
- sl st = slip stitch
- DC = double crochet
- inc = increase (2 stitches in the same stitch)
- dec = decrease (crochet two stitches together as one)
Special Stitches
None for this pattern, but don't hesitate to refer back to the definitions above if you need help with the basic stitches!
Let’s Get Started: Full Pattern Instructions
Body of the Laptop Sleeve
Using Color A (Charcoal Gray):
Round 1
- Start with a slip knot on your hook.
- Foundation Row: Ch 35 (for the small size). For medium, use ch 39; for large, ch 43.
- Row 1: Sc in the 2nd ch from the hook (this creates your first stitch), then sc in each ch across until you reach the end. You should have 34 stitches for small, 38 for medium, and 42 for large.
Round 2
- Row 2: Ch 1 (this counts as your first stitch now), turn your work, and sc in each st across (34 st).
Round 3
- Repeat Row 2 until your piece measures:
- Small size: 10 inches
- Medium size: 11 inches
- Large size: 12 inches
Beginner Tip: Use a measuring tape to check the size often to ensure you're on track!
Transition to Flap
- After the last row, do not fasten off. Instead, we are changing color now to Color B (Soft Blue).
Flap
- Row 1: Ch 1, sc in each st across (34 st).
- Rows 2-4: Repeat Row 1 for 4 additional rows (34 st each time).
- Row 5: Ch 1, sc in each of the first 15 sts, ch 1 (this creates a buttonhole), skip 4 sts, sc in last 15 sts (34 st).
- Row 6: Ch 1, turn, and sc in each stitch across (34 st).
Edging
With Color A, make a sc around the entire sleeve. In each corner, place 2 sc to help round the edges. Join with a sl st at the starting st, then fasten off.
Buttonhole Step: Attach the large button on the center top edge of the flap after ensuring it's positioned correctly for closure. Use the tapestry needle to sew it in securely.
Assembly / Putting It All Together
- Fold the bottom of the sleeve up to create a pocket. Make sure the edges are aligned properly.
- Use a whip stitch or slip stitch to join the side seams. Make sure to leave the top open so you can use the flap.
Beginner Tip: Take your time with the stitching to ensure it looks neat!
- Weave in all ends using your tapestry needle, which means threading the yarn ends through the stitches to hide them.
- If desired, lightly block your piece. Blocking means laying it flat or steaming it slightly to help give it a nice shape.
Finishing
- Weave in Ends: Take your tapestry needle and use it to go through the stitches with the loose yarn ends, hiding them in the work. This helps create a clean look!
- Blocking (optional): This technique allows your crochet piece to take on its intended shape. You can dampen the fabric lightly with water and lay it flat to dry, smoothing it into shape as desired.
FULL RECIPE-CARD-STYLE SUMMARY BOX
- Title: Crochet Laptop Sleeve - Easy Pattern for Beginners
- Yield: 1
- One-line description: A cozy crochet laptop sleeve with a stylish button flap.
- Full materials list:
- 200 yards Charcoal Gray yarn (Weight category: Worsted)
- 50 yards Soft Blue yarn
- 1 large button (1-1.5” in diameter)
- Scissors, yarn/tapestry needle, optional stitch markers
- Full tools list:
- 5.5 mm (I-9) hook, measuring tape, pins
- Full numbered instructions:
- Foundation Row: Ch 35 (sm), Ch 39 (med), Ch 43 (lg)
- Row 1: Sc in 2nd ch from hook, sc across (34 st)
- Row 2: Ch 1, turn, sc across (34 st)
- Repeat Row 2 until measures 10” (sm), 11” (med), 12” (lg)
- Change to Color B, Row 1: Ch 1, sc across (34 st)
- Rows 2-4: Repeat Row 1 (34 st)
- Row 5: Ch 1, sc 15, ch 1 (buttonhole), sc 15 (34 st)
- Row 6: Ch 1, sc across (34 st)
- Edging: Sc around sleeve, 2 sc in corners, join with sl st, fasten off
- Attach button securely on flap
- Notes: For tighter fit, adjust chain; for cleanliness, consider a cotton blend yarn.
What’s Next?
Save this for later: Make sure to pin this post to Pinterest so you can find it again and create your lovely laptop sleeve!
Leave a comment: If you have any questions or need help, feel free to ask! All questions are welcome.
Share your finished project: I’d love to see your finished laptop sleeve! Don’t worry if it’s not perfect; each creation is special in its own way.
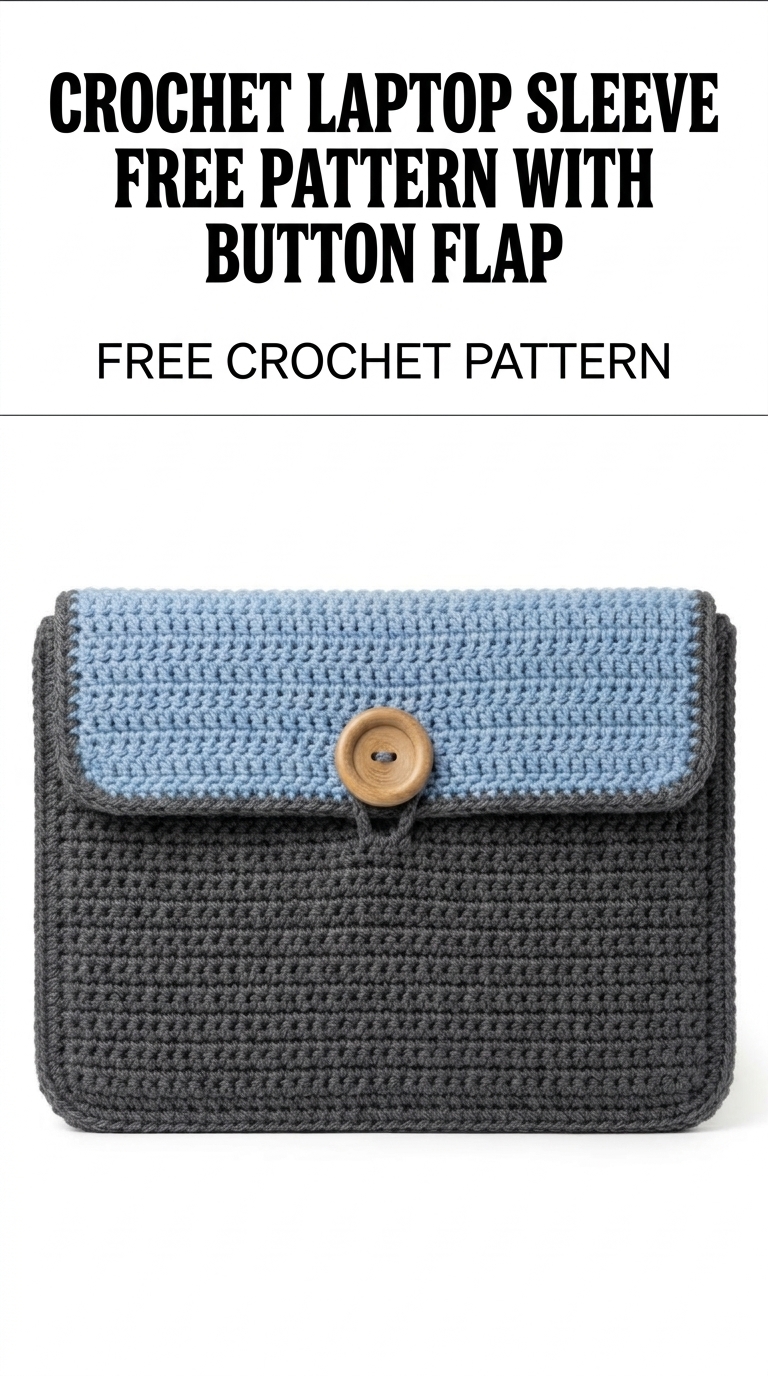
Image shown for inspiration — your finished result may vary slightly.