Chunky Crochet Round Rug Free Pattern for the Living Room
You'll learn how to make a chunky round rug that's perfect for adding warmth and style to your living room. This pattern is easy to follow, making it a great choice for beginners. Get ready to create something cozy!
Published October 5, 2026 · by Lina
- Skill level
- Beginner
- Yarn weight
- Bulky weight
- Hook size
- 10 mm (N/P-15)
- Time
- Around 4-5 hours
- Sizes
- Approximately 36 inches (91 cm) in diameter
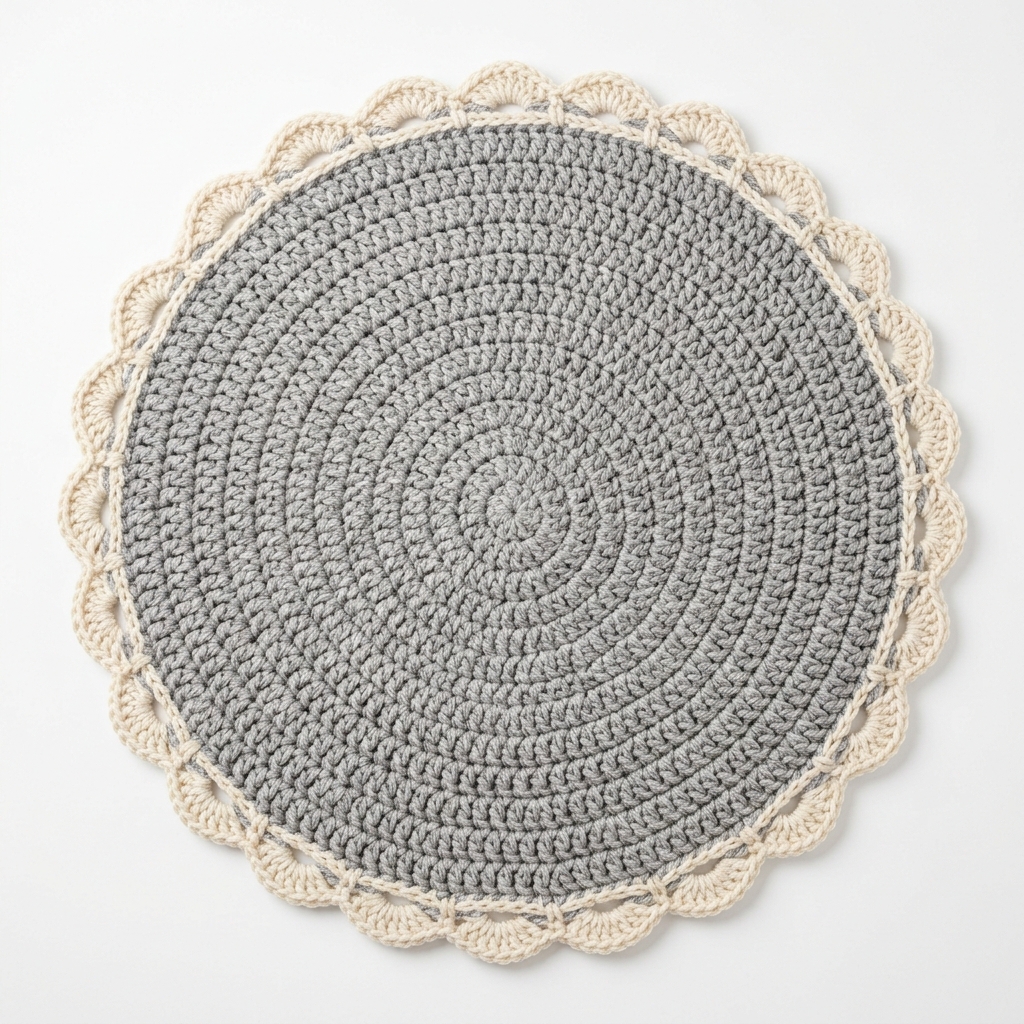
You'll learn how to make a chunky round rug that's perfect for adding warmth and style to your living room. This pattern is easy to follow, making it a great choice for beginners. Get ready to create something cozy!
[Descriptive image caption of the finished piece]
Why You’ll Love This Pattern
This chunky rug is not only beautiful but also functional! It adds comfort to your space and is a fun project to crochet. With just a few hours of work, you'll have a lovely piece that enhances your home decor.
In This Post
- What You'll Need
- Stitches You'll Use in This Pattern
- Pattern Details
- Abbreviations
- Special Stitches
- Let's Get Started: Full Pattern Instructions
- Assembly / Putting It All Together
- Finishing
- Full Recipe-Card-Style Summary Box
- What's Next?
What You'll Need
Yarn:
- Bulky weight yarn, 100% acrylic
You'll need about 600 yards (550 meters) of Soft Gray and 200 yards (180 meters) of Cream. Bulky yarn is perfect because it's thick, making it easier to see your stitches. It also works up quickly.
- Bulky weight yarn, 100% acrylic
Crochet Hook:
- 10 mm (N/P-15)
This large hook size helps create the nice, thick texture of the rug.
- 10 mm (N/P-15)
Stitch Markers (optional but helpful):
These markers can help you keep track of your rounds, ensuring you don’t lose your place.Scissors:
To cut your yarn when you're finished.Yarn/Tapestry Needle:
Used for weaving in ends. This helps give your project a neat finish.Fabric or rubber rug grip backing (optional, for non-slip):
This backing can be attached to the bottom of your rug to help it stay in place.
Stitches You'll Use in This Pattern
Chain (ch):
To make a foundation for your work, you'll create small loops.Single Crochet (sc):
To create the main fabric of your rug. Here’s how to do it:- Insert your hook into the stitch.
- Yarn over (wrap the yarn around your hook).
- Pull the yarn through the stitch (you will have two loops on your hook).
- Yarn over again.
- Pull through the two loops on your hook. You've completed a single crochet!
Slip Stitch (sl st):
This stitch is used to join rounds together. Here’s how to do it:- Insert your hook into the stitch.
- Yarn over.
- Pull the yarn directly through the stitch and the loop on your hook.
Increase (inc):
This means adding two single crochet stitches into the same stitch.Decrease (dec):
This means stitching two single crochet stitches together into one stitch.
Pattern Details
- Skill Level: Beginner
- Finished Size: Approximately 36 inches (91 cm) in diameter
- Time to Complete: Around 4-5 hours
- Yarn Amounts:
- Soft Gray: 600 yards (550 meters)
- Cream: 200 yards (180 meters)
- Terms: This pattern uses US crochet terms.
Abbreviations
- ch = chain
- sc = single crochet
- sl st = slip stitch
- st(s) = stitch(es)
- inc = increase (2 sc in the same stitch)
- dec = decrease (2 sc worked together as one)
Special Stitches
No special stitches are used in this pattern!
Let's Get Started: Full Pattern Instructions
Round 1: Foundation
- Ch 4: Create a chain of 4 stitches and join with a slip stitch to form a ring. (1 st)
- Ch 1, then 8 sc into the ring: Insert your hook into the middle of the ring. Yarn over and pull through. You now have 2 loops on your hook. Yarn over again and pull through both loops on your hook to make your first single crochet. Repeat until you have 8 single crochet stitches in the ring. Join with a slip stitch to the first single crochet. (8 sts)
Round 2: Increase
- Ch 1, then 2 sc in each st around: Make sure to place your hook into each of the 8 stitches and do 2 single crochet stitches into each of them. Join with a slip stitch to the first single crochet. (16 sts)
Round 3: Increase
- Ch 1, then [1 sc in next st, 2 sc in next st] repeat around: This means you will do one single crochet in the first stitch, and then in the next stitch, do 2 single crochets. Repeat this until you have finished the round. Join with a slip stitch. (24 sts)
Round 4: Increase
- Ch 1, then [1 sc in next 2 sts, 2 sc in next st] repeat around: Do one single crochet in each of the first 2 stitches, and then do 2 single crochets in the next one. Repeat until completed. Join with a slip stitch. (32 sts)
Round 5: Increase
- Ch 1, then [1 sc in next 3 sts, 2 sc in next st] repeat around: Do a single crochet in each of the first 3 stitches, and then do 2 single crochets in the next. Repeat around. Join with a slip stitch. (40 sts)
Round 6: Increase
- Ch 1, then [1 sc in next 4 sts, 2 sc in next st] repeat around: Do a single crochet in the first 4 stitches, and then do 2 single crochets in the next. Repeat until the end of the round. Join with a slip stitch. (48 sts)
Rounds 7-12: Continue Round
- Ch 1, then 1 sc in each st around: For the next 6 rounds, simply make one single crochet in each of the 48 stitches. Join with a slip stitch at the end of each round. (48 sts)
Rounds 13-14: Color Change to Cream
- Round 13: Change to Cream yarn. Ch 1, then 1 sc in each st around: Join with a slip stitch. (48 sts)
- Round 14: Ch 1, then 1 sc in each st around: Join with a slip stitch. (48 sts)
Edging (Optional)
- Ch 1, then sc in first st, ch 1, skip next st, sc in next st around: This creates a nice decorative edge. Join with a slip stitch.
Assembly / Putting It All Together
- If you decided to use a rug grip backing, attach it to the underside of your rug using fabric glue or follow the manufacturer’s instructions.
- Take your tapestry needle and carefully weave in all of the yarn ends. This gives your rug a polished look.
- If your rug has any bumps or doesn’t lie flat, you can block it. Blocking is the process of dampening your crochet piece and then shaping it to dry flat.
Finishing
Weave in Ends
Using your yarn or tapestry needle, thread the end of the yarn and pull it through the stitches on the back of the rug. This locks the yarn in place and keeps your project looking neat.
Blocking (optional)
Blocking can help your rug lay flat. To block, moisten the rug gently (you can spray it with some water) and lay it out flat in the desired shape. Allow it to dry completely.
Full Recipe-Card-Style Summary Box
- Title: Chunky Crochet Round Rug
- Yield: 1
- One-line description: A cozy and stylish round rug for your living room, perfect for beginners.
- Full Materials List:
- Bulky weight yarn, Soft Gray - 600 yards (550 meters)
- Bulky weight yarn, Cream - 200 yards (180 meters)
- Optional: Fabric or rubber rug grip backing
- Full Tools List:
- 10 mm (N/P-15) crochet hook
- Scissors
- Stitch markers (optional)
- Tapestry needle
- Full Numbered Instructions:
- Round 1: Ch 4, join to form a ring. Ch 1, 8 sc into the ring. Join with sl st. (8 sts)
- Round 2: Ch 1, 2 sc in each st around. Join with sl st. (16 sts)
- Round 3: Ch 1, [1 sc in next st, 2 sc in next st] repeat around. Join with sl st. (24 sts)
- Round 4: Ch 1, [1 sc in next 2 sts, 2 sc in next st] repeat around. Join with sl st. (32 sts)
- Round 5: Ch 1, [1 sc in next 3 sts, 2 sc in next st] repeat around. Join with sl st. (40 sts)
- Round 6: Ch 1, [1 sc in next 4 sts, 2 sc in next st] repeat around. Join with sl st. (48 sts)
- Rounds 7-12: Ch 1, 1 sc in each st around for 6 rounds. Join with sl st. (48 sts)
- Round 13: Change to Cream. Ch 1, 1 sc in each st around. Join with sl st. (48 sts)
- Round 14: Ch 1, 1 sc in each st around. Join with sl st. (48 sts)
- Edging: Ch 1, sc in first st, ch 1, skip next st, sc in next st around. Join with sl st.
- Notes: Enjoy your cozy new rug and don't hesitate to customize it with different colors!
What's Next?
Save this for later: Make sure to pin this post to Pinterest so you can come back to it easily!
Leave a comment: If you have any questions or need help, feel free to ask! I'm here to help you.
Share your finished project: I'd love to hear about your rug once it's done! Share your progress with me!
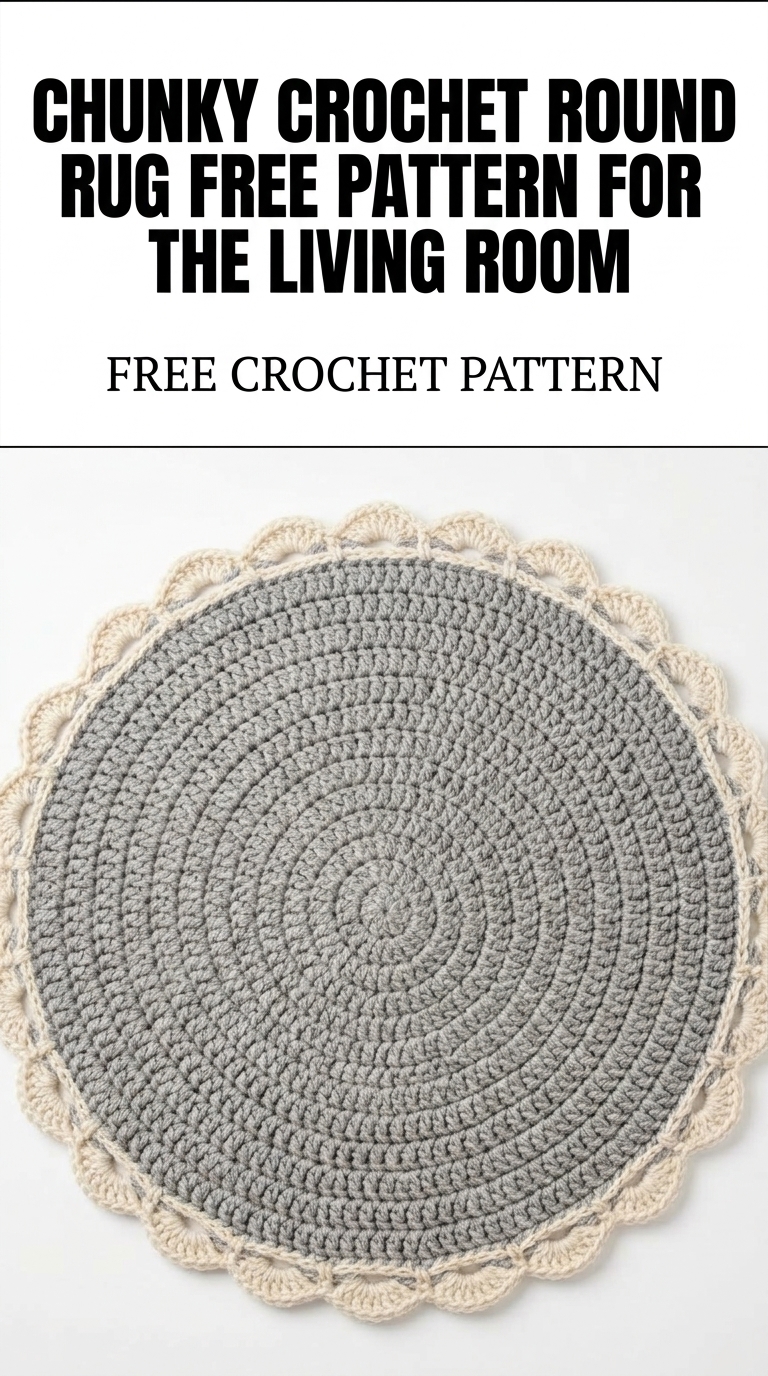
Image shown for inspiration — your finished result may vary slightly.