How to Crochet a Granny Square Shoulder Bag – Easy Pattern for Beginners
In this project, we’ll create a stylish and functional shoulder bag made from crochet granny squares in beautiful neutral tones. This project is perfect for beginners, and I'll walk you through every step to make your own unique bag!
Published October 5, 2026 · by Lina
- Skill level
- Beginner
- Yarn weight
- Worsted weight
- Hook size
- 5.0 mm
- Time
- Approximately 11 hours
- Sizes
- Approximately 12 inches wide by 10 inches tall (30 cm x 25 cm)
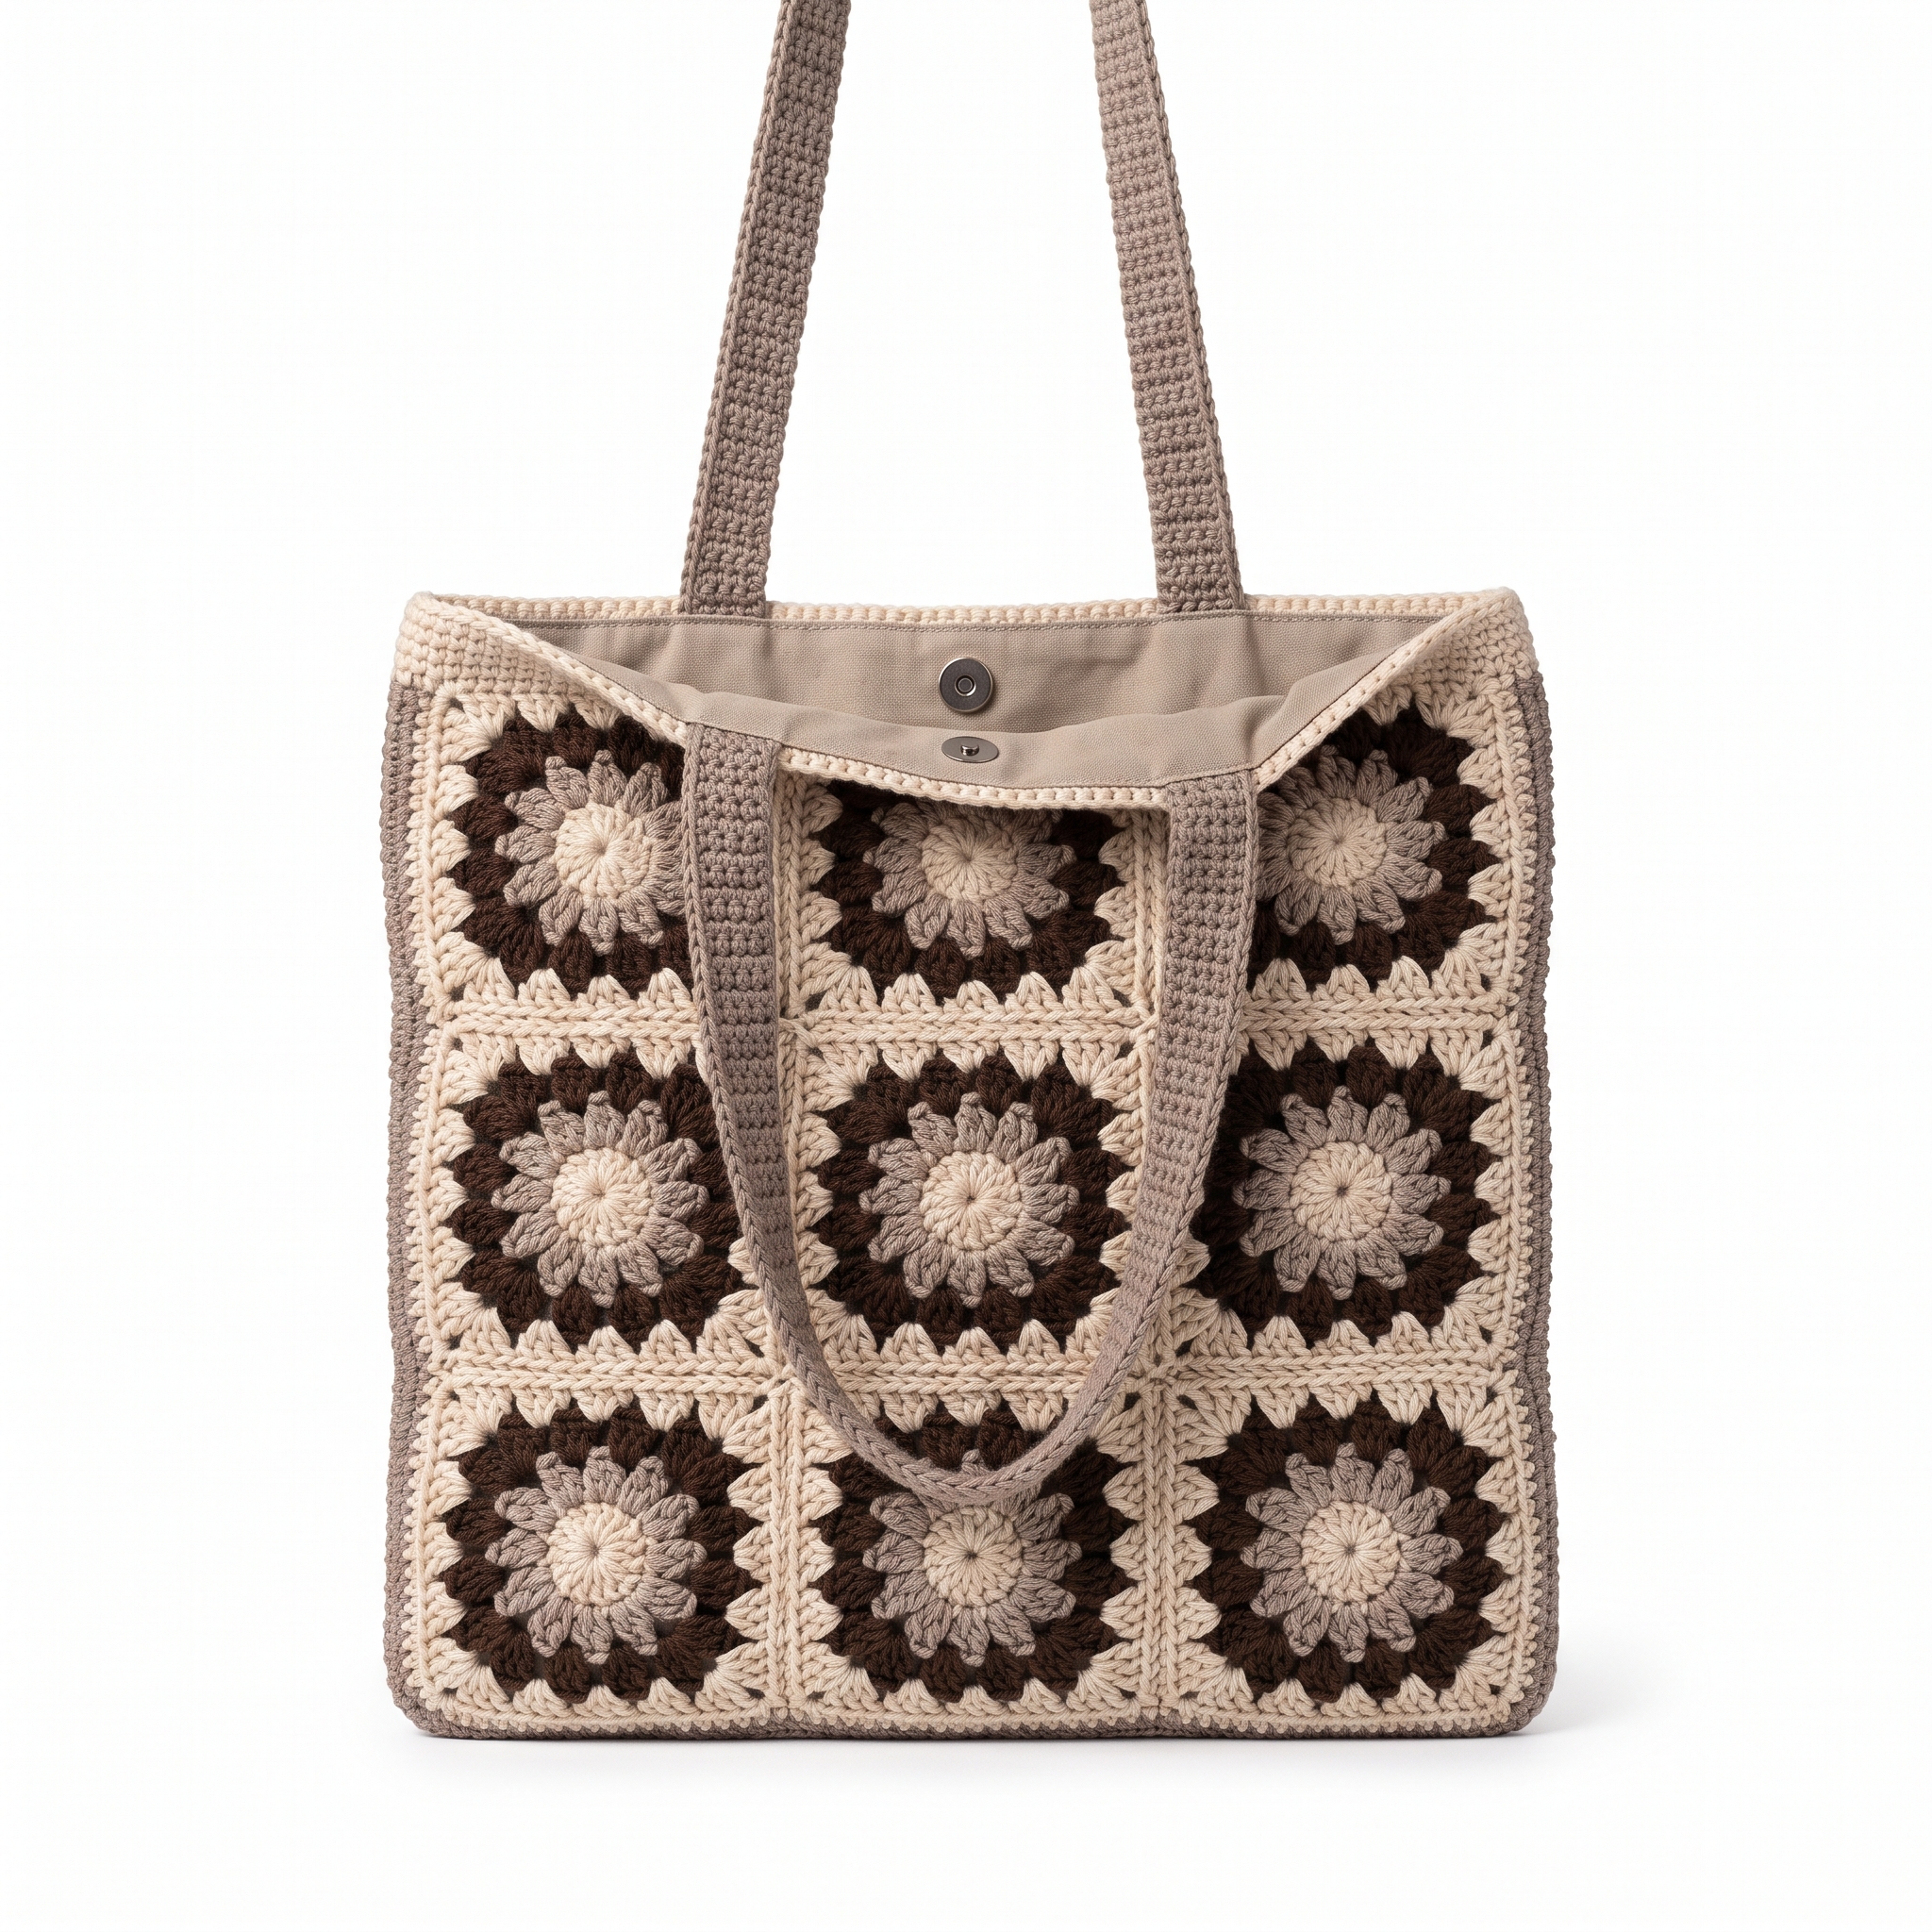
In this project, we’ll create a stylish and functional shoulder bag made from crochet granny squares in beautiful neutral tones. This project is perfect for beginners, and I'll walk you through every step to make your own unique bag!
[Descriptive image caption of the finished piece]
Why You'll Love This Pattern
This pattern is a great way to practice your crochet skills while creating something practical and fashionable. You'll enjoy working with simple Granny Squares, and the neutral colors make this bag easy to match with any outfit. Plus, you’ll be able to complete your bag in just a few hours!
In This Post
- What You'll Need
- Stitches You'll Use in This Pattern
- Pattern Details
- Abbreviations
- Special Stitches
- Let's Get Started: Full Pattern Instructions
- Assembly / Putting It All Together
- Finishing
- FULL RECIPE-CARD-STYLE SUMMARY BOX
- What's Next?
What You'll Need
- Yarn:
- Worsted weight (Category 4) — This is a medium-thickness yarn, making it easy to see your stitches.
- Fiber Content: 100% acrylic
- Colors:
- Light Beige (approx. 150 yards)
- Medium Taupe (approx. 150 yards)
- Dark Brown (approx. 150 yards)
- Additional Materials:
- Lining fabric: 1/2 yard of cotton or canvas in a coordinating color, to give the bag a finished look.
- Magnetic snap closure (1) — This will keep your bag securely closed.
- Yarn needle for weaving in ends — This helps tidy up any loose threads.
- Scissors to cut your yarn.
Tools & Equipment
- Hooks:
- Size H (5.0 mm) and Size G (4.0 mm) hooks
- Other Tools:
- Tapestry needle for weaving in ends: This is different from your crochet hook; it has a larger eye for thicker yarn.
- Stitch markers (optional but helpful) — These can help you keep track of rounds.
- Pins for lining to hold your fabric in place while sewing.
Stitches You'll Use in This Pattern
- ch = chain — To create the starting loops.
- sl st = slip stitch — This is used to join rounds in a way that keeps the fabric flat.
- sc = single crochet — This is a basic stitch that creates a tight, dense fabric.
- dc = double crochet — A taller stitch that creates more open space.
- sp = space — This refers to the open area between stitches, typically used in Granny Squares.
- pc = popcorn — A fun stitch (5 dc in the same stitch, remove your hook, insert it through the first dc of the group, then pull the loop back through the top) that creates a textured bobble.
Pattern Details
- Skill Level: Beginner
- Finished Size: Approximately 12 inches wide by 10 inches tall (30 cm x 25 cm)
- Time to Complete: Approximately 11 hours
- Yarn Amounts:
- Light Beige: 150 yards
- Medium Taupe: 150 yards
- Dark Brown: 150 yards
- Terms: This pattern uses US crochet terms.
Abbreviations
- ch = chain
- sl st = slip stitch
- sc = single crochet
- dc = double crochet
- sp = space
- pc = popcorn
Special Stitches
- Popcorn (pc):
- Yarn over and insert your hook into the designated stitch.
- Yarn over again and pull up a loop (three loops on hook).
- Yarn over and pull through the first two loops (two loops remain).
- Yarn over and pull through the remaining two loops.
- Repeat these steps four more times into the same stitch.
- After your five double crochets, remove your hook from the last loop.
- Insert your hook through the first double crochet of the group and pull the last loop through to form the popcorn stitch.
Let's Get Started: Full Pattern Instructions
Granny Square Construction (Make 9)
You will make a total of 9 Granny Squares for the bag.
Granny Square (Round 1)
- With Light Beige yarn, make a magic circle.
- Round 1:
- Chain 3 (this counts as your first double crochet).
- Inside the circle, work 2 double crochets (dc).
- Chain 2.
- Work 3 double crochets into the circle, then chain 2.
- Repeat from * to * two more times.
- Join with slip stitch (sl st) to the top of the initial chain 3.
- You should have 12 double crochets and 3 chain-2 spaces.
- (12 dc, 3 ch-2 spaces)
Round 2
- Change to Medium Taupe yarn.
- Slip stitch to the first chain-2 space.
- Chain 3 (counts as first double crochet).
- Work 2 double crochets into the same chain-2 space.
- Chain 2.
- Work 3 double crochets into the next chain-2 space, then chain 2.
- Repeat from * to * two more times.
- Join with slip stitch to the top of the initial chain 3.
- You should have 24 double crochets and 6 chain-2 spaces.
- (24 dc, 6 ch-2 spaces)
Round 3
- Change to Dark Brown yarn.
- Slip stitch to the first chain-2 space.
- Chain 3 (counts as first double crochet).
- Work 2 double crochets in the same space.
- Chain 2.
- Work 3 double crochets into the next chain-2 space, then chain 2.
- Repeat from * to * two more times.
- Join with slip stitch to the top of the initial chain 3.
- You should have 36 double crochets and 9 chain-2 spaces.
- (36 dc, 9 ch-2 spaces)
Round 4
- Change to Light Beige yarn.
- Slip stitch to the first chain-2 space.
- Chain 3 (counts as first double crochet).
- Work 2 double crochets in the same space.
- Chain 2.
- Work 3 double crochets into the next chain-2 space, then chain 2.
- Repeat from * to * two more times.
- Join with slip stitch to the top of the initial chain 3.
- You should have 48 double crochets and 12 chain-2 spaces.
- (48 dc, 12 ch-2 spaces)
Join Squares
- Lay out all 9 squares in 3 rows of 3.
- With Light Beige yarn and using a slip stitch, join the squares in rows first.
- Then join the rows together, going through the back loops only of adjacent squares.
Bag Body
- Bag Sides:
- Attach a new Light Beige yarn to one side.
- Chain 1.
- Work 1 single crochet (sc) in each of the 48 stitches across each of the 3 sides of the bag body.
- This will give you a total of 144 single crochets.
- (144 sc total)
- Work 10 more rows of single crochet in Light Beige to create the sides of the bag.
Bag Straps
- Strap (Make 2):
- With Medium Taupe yarn, chain 90.
- Row 1:
- Single crochet in the 2nd chain from the hook and in each chain across.
- You should have 89 single crochets.
- (89 sc)
- Leave a long tail for sewing the strap to the bag.
Assembly & Finishing
Attach Straps:
- Sew each strap to the bag using the long tails from the straps.
- Position straps about 5 inches in from each side for comfort.
Lining:
- Cut the lining fabric to match the dimensions of the bag.
- Pin the lining to the inside of the bag.
- Sew the lining to the bag at the top edge to secure it in place.
Snap Closure:
- Attach the magnetic snap closure at the top of the bag.
- Line it up with the lining to keep everything secure.
Weave in Ends:
- Use a tapestry needle to weave in any yarn ends that may be loose.
Blocking (Optional):
- Lightly block the bag by misting it with water and shaping it to the desired form.
- This helps to give your finished bag a nice shape.
Measurements & Dimensions
- Final bag dimensions: 12 inches wide x 10 inches tall (30 cm x 25 cm)
- Each granny square dimensions: 6 inches (15 cm)
Timing Information
- Approximate time to complete each granny square: 1 hour
- Total time for bag assembly and finishing: 2 hours
- Estimated total working time: 11 hours
Variations & Notes
- For a different style, feel free to use bright colors or even ombre shades!
- Make sure not to knot the yarn when changing colors; instead, carry the yarn along the edge of your round to keep everything looking neat.
- Remember to hand wash your bag only and lay it flat to dry for maintenance and longevity.
FULL RECIPE-CARD-STYLE SUMMARY BOX
- Title: Granny Square Shoulder Bag
- Yield: 1
- Description: A stylish shoulder bag made from crochet granny squares in neutral tones.
- Materials List:
- Light Beige yarn (approx. 150 yards)
- Medium Taupe yarn (approx. 150 yards)
- Dark Brown yarn (approx. 150 yards)
- Lining fabric: 1/2 yard
- Magnetic snap closure (1)
- Tools List:
- Size H (5.0 mm) hook
- Size G (4.0 mm) hook
- Yarn needle
- Stitch markers (optional)
- Scissors
- Pins for lining
- Instructions:
- Make 9 granny squares following the instructions above.
- Join the squares as described.
- Create the sides of the bag with single crochet.
- Make 2 straps and attach them.
- Add the lining and magnetic snap closure.
- Weave in ends and optionally block the bag.
- Notes: Customize with colors as desired.
What's Next?
Save this for later: Don’t forget to save this post on Pinterest so you can find it again when you're ready to start crocheting!
Leave a comment: If you have any questions or need help, feel free to ask! All questions are welcome.
Share your finished project: I’d love to hear about your experience and see your finished bag! Happy crocheting!
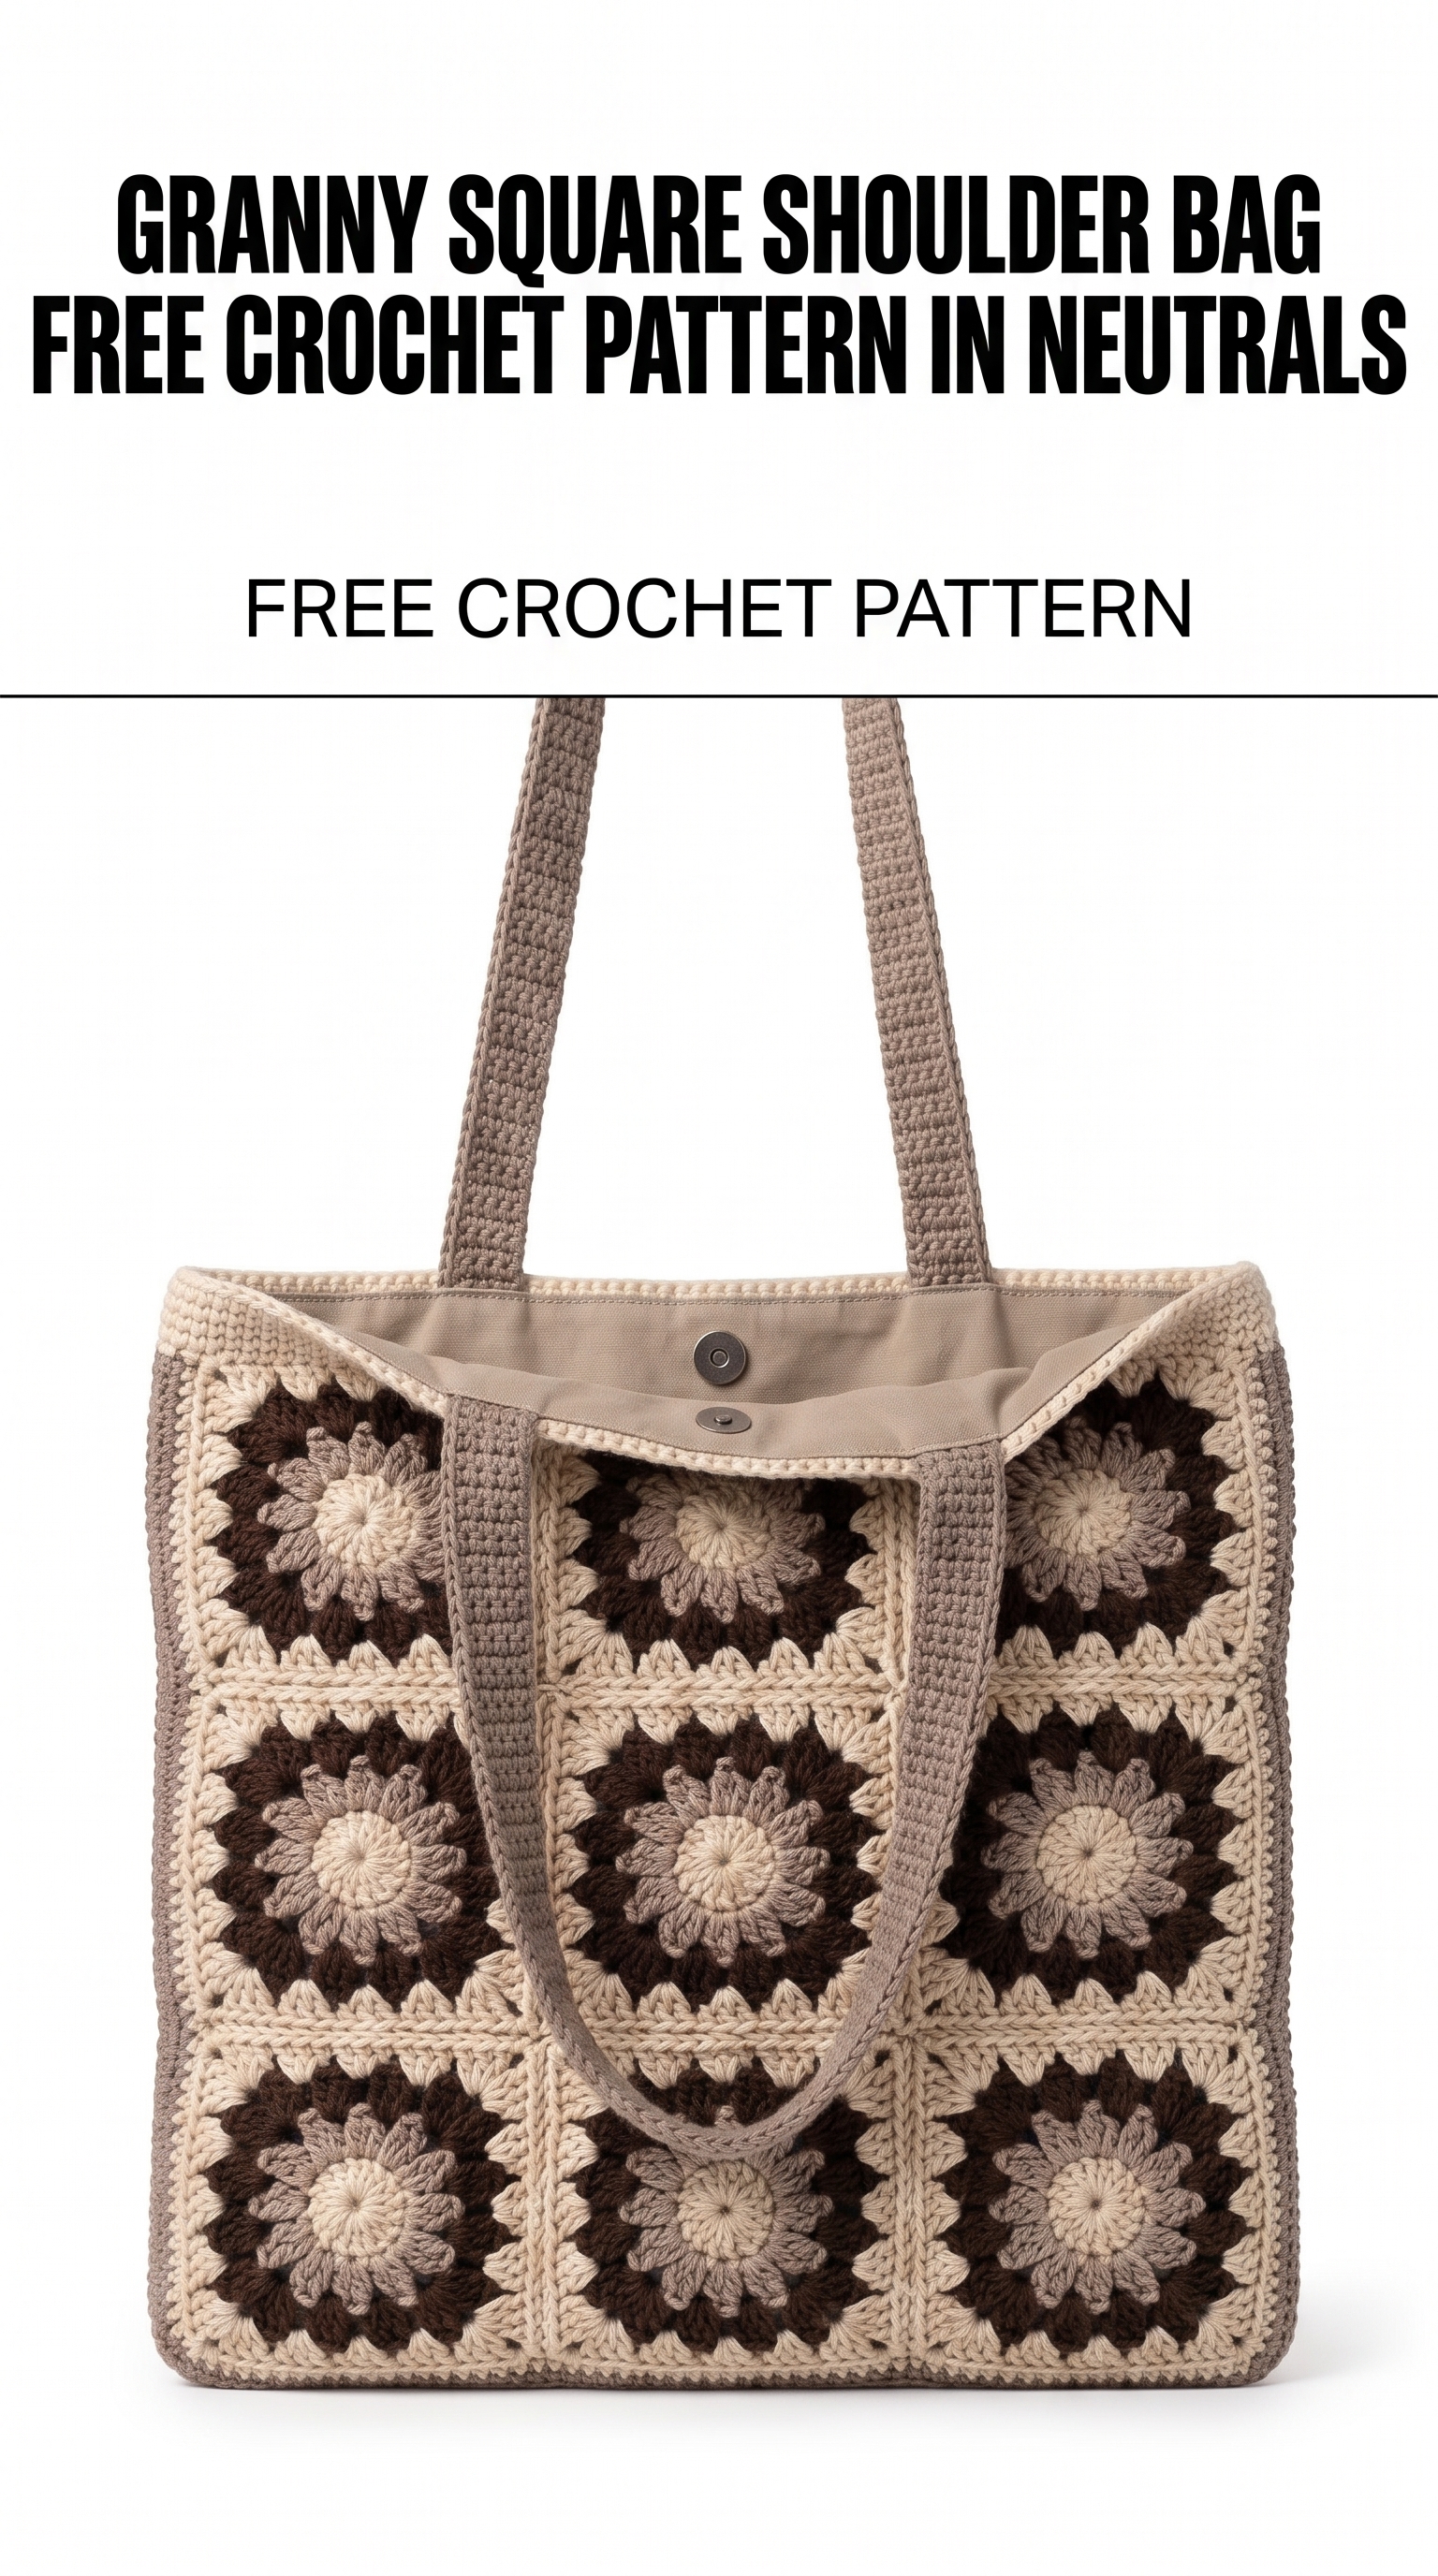
Image shown for inspiration — your finished result may vary slightly.