How to Crochet a Sofa Arm Throw Blanket Holder (The Throw Saddle)
You’re about to make a charming and useful crochet blanket holder, perfect for lounging on your sofa with your favorite throw close at hand. This pattern is designed with beginners in mind, so don’t worry if you’re new to crochet!
Published October 5, 2026 · by Lina
- Skill level
- Beginner
- Yarn weight
- Worsted weight
- Hook size
- 5.5 mm (I/9)
- Time
- 3-4 hours
- Sizes
- Approximately 18 inches wide by 14 inches deep (45.72 cm x 35.56 cm)
You’re about to make a charming and useful crochet blanket holder, perfect for lounging on your sofa with your favorite throw close at hand. This pattern is designed with beginners in mind, so don’t worry if you’re new to crochet!
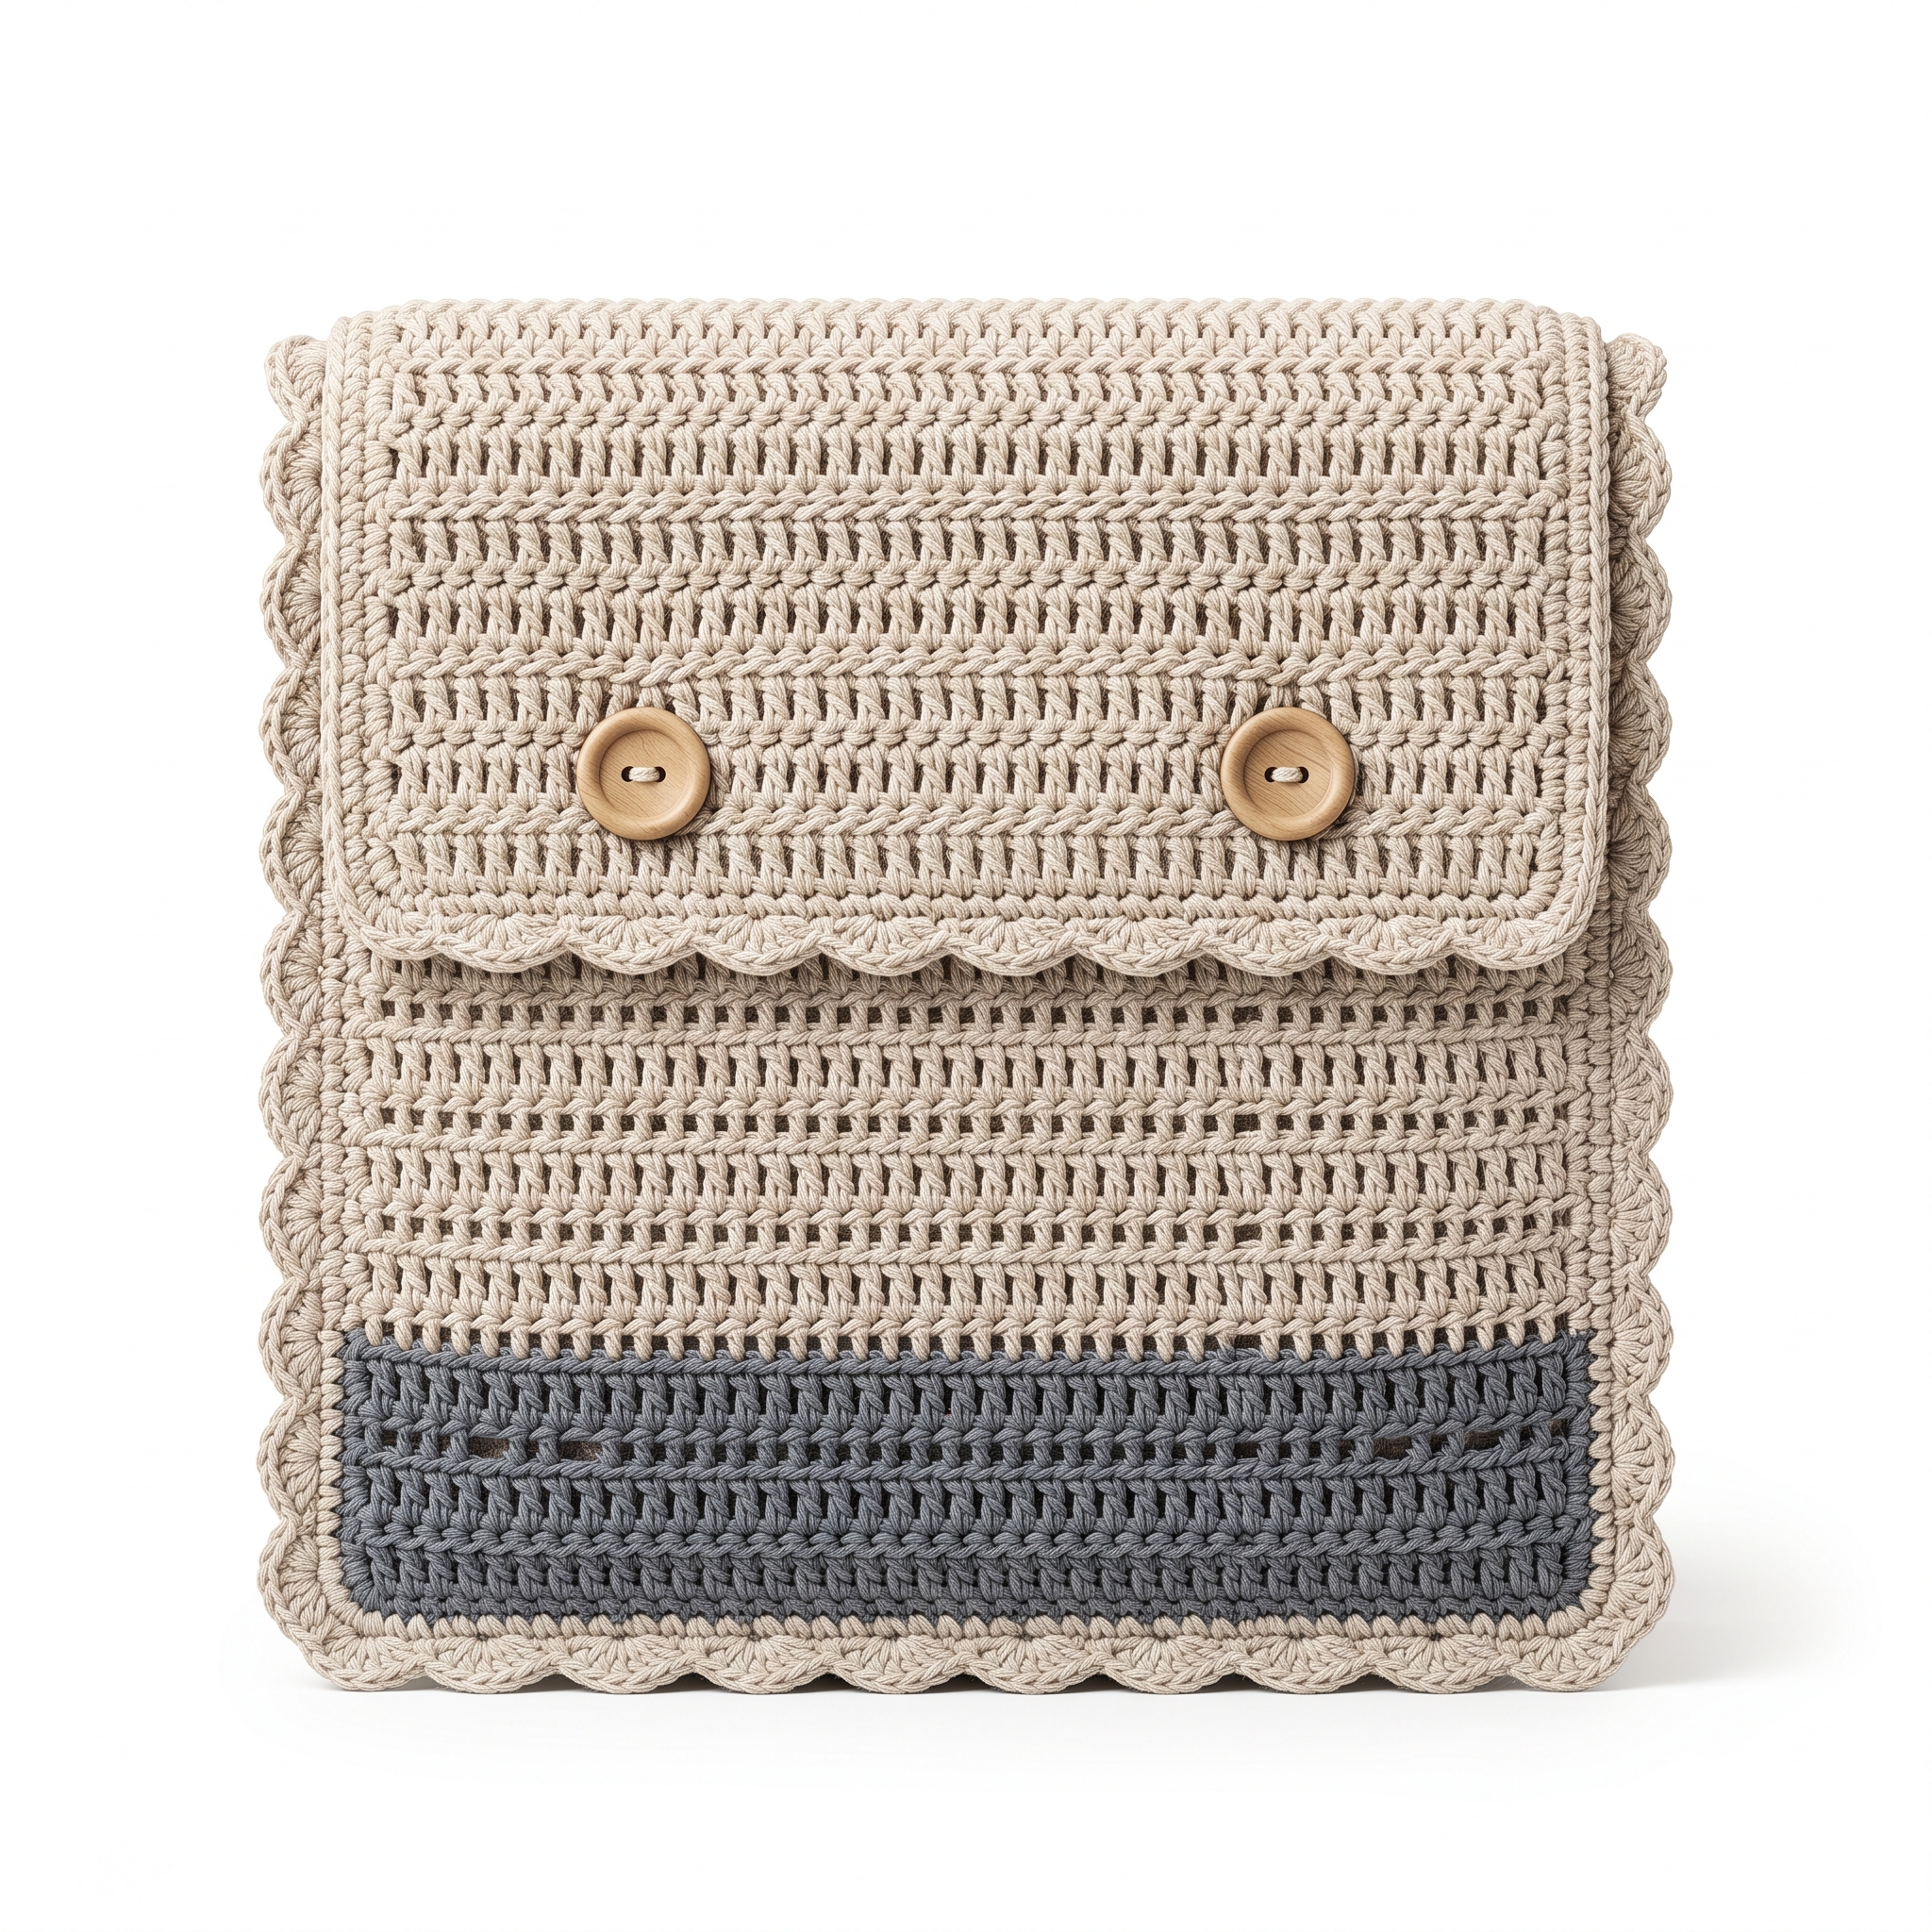
[Descriptive image caption of the finished piece]
WHY YOU'LL LOVE THIS PATTERN
This blanket holder is not only practical but also adds a cozy touch to your living space. It’s a lovely way to showcase your crochet skills, and it usually takes about 3-4 hours to complete. Plus, let’s be honest: who doesn’t enjoy making something that looks great and is functional?
TABLE OF CONTENTS
- What You'll Need
- Stitches You'll Use in This Pattern
- Pattern Details
- Abbreviations
- Special Stitches
- Let's Get Started: Full Pattern Instructions
- Assembly / Putting It All Together
- Finishing
- FULL RECIPE-CARD-STYLE SUMMARY BOX
- What's Next?
What You'll Need
Yarn:
- Worsted weight yarn (medium weight) — This yarn is thick enough to provide structure but easy enough to both see and work with. You'll need about 200 yards of the main color (MC) in Linen (#100) and 100 yards of the contrast color (CC) in Slate Gray (#300).
Crochet Hook:
- 5.5 mm (I/9) and 6.0 mm (J/10) — The 5.5 mm is used for the main body, and the 6.0 mm is for the trim.
Stitch Markers (optional but helpful):
- These help you keep track of your stitches and rows. They can be used to mark the beginning of a round or important stitch counts.
Scissors:
- For cutting your yarn when finishing.
Yarn/Tapestry Needle:
- This needle is used for weaving in ends after finishing your project. It's important to hide any loose ends to make your work look neat!
Pins for Blocking (optional):
- Use these if you want to shape your completed piece nicely.
Wooden Buttons (1/2 inch, 1.27 cm) - 2:
- These will be added for closure on your throw saddle.
Stitches You'll Use in This Pattern
- Ch (chain): Create a series of loops by pulling the yarn through itself. This will form the base of your project.
- Sc (single crochet): Insert your hook into a stitch, yarn over and pull up a loop, yarn over again and pull through both loops on the hook. This creates a tight, dense stitch.
- Dc (double crochet): Yarn over, insert your hook into a stitch, yarn over and pull up a loop. You will have three loops on your hook. Yarn over again and pull through the first two loops, yarn over and pull through the last two loops. This stitch is taller than single crochet.
- Sl st (slip stitch): Insert your hook into a stitch, yarn over and pull through both the stitch and the loop on your hook to join pieces or finish rows.
- Foundation Double Crochet (fdc): Instead of creating a foundation chain, you’ll yarn over and insert your hook into the base, pull up a loop, yarn over and pull through one loop (this creates the starting chain), yarn over and pull through two loops twice to finish the double crochet.
Pattern Details
- Skill Level: Beginner
- Finished Size: Approximately 18 inches wide by 14 inches deep (45.72 cm x 35.56 cm)
- Time to Complete: 3-4 hours
- Yarn Amounts:
- 200 yards Main Color (Linen),
- 100 yards Contrast Color (Slate Gray)
- Terms: This pattern uses US crochet terms.
Abbreviations
- ch = chain
- dc = double crochet
- sc = single crochet
- sl st = slip stitch
- st(s) = stitch(es)
Special Stitches
- Foundation Double Crochet (fdc):
- Yarn over and insert your hook into the base of the stitch instead of making a chain.
- Pull up a loop, so you have three loops on your hook.
- Yarn over and pull through one loop (this creates the foundation chain).
- Yarn over and pull through the next two loops on your hook.
- Yarn over and pull through the last two loops on your hook. You have completed one fdc!
Let's Get Started: Full Pattern Instructions
Body
Row 1:
With Main Color (MC), make 34 foundation double crochet (fdc). (34 sts)
Row 2:
Ch 3 (this counts as your first double crochet), turn your work. In each of the next 33 stitches (st), make a double crochet (dc). (34 sts)
Row 3:
Ch 1, turn your work. Sc in the first st. Then, ch 1 (this creates a space), skip the next stitch, sc in the next st. Repeat from * to * across until you reach the last stitch. Sc in the last stitch. (17 sc, 17 ch-1 spaces)
Row 4:
Ch 3, turn your work. Dc in each single crochet (sc) across. (34 sts)
Row 5:
Change to Contrast Color (CC). Ch 3, turn your work. Dc in the first 17 stitches. Ch 8, skip the next stitch, dc in the last 16 stitches. (34 sts)
Row 6:
Ch 3, turn your work. Dc in each of the first 16 dc. Then, dc in the 8 chain stitches you created. Dc in the remaining 16 dc. (34 sts)
Row 7:
Ch 1, turn your work. Sc in the first 16 dc. Then, for the next 8 stitches, ch 1, skip 1 stitch. Sc in the remaining 10 stitches. (17 sc, 8 ch-1 spaces)
Row 8-14:
Repeat Rows 4-8 four more times. This means you will complete Rows 4, 5, 6, 7, and 8, four total times for a total of seven complete sections of stitches and spaces.
Trim
Row 15:
With MC, ch 1, turn your work. Sc evenly around all edges of the throw saddle. There should be about 56 sc total. Place 1 sc in each corner to help the edges turn nicely.
Row 16:
Without turning your work, make a slip stitch (sl st) into the first single crochet (sc) from Row 15. Fasten off your yarn, leaving a tail for weaving in. Weave in all ends using your tapestry needle.
Assembly / Putting It All Together
- Fold over the top section of the throw saddle to create a flap that will hold your blanket.
- Use your tapestry needle to sew the two wooden buttons onto the front flap. Space them evenly near the top of the flap.
- If your throw saddle flares out, secure the edges with pins and gently block the piece to your final measurements, guiding it to fit nicely over the arm of the sofa.
Finishing
Weave in Ends: Take your tapestry needle and thread the yarn tails into the needle. Position the needle at the base of the last stitch, and push it through a few stitches on the reverse side of your work. This secures your loose yarn and keeps everything tidy. Trim any excess.
Blocking (optional): This is the process of dampening your finished piece and pinning it to the shape you want. It helps everything lay flat and reshape any uneven edges. To do this, gently wet the piece, lay it flat, and use pins to hold it in place until it dries.
FULL RECIPE-CARD-STYLE SUMMARY BOX
- Title: Crochet Sofa Arm Throw Blanket Holder (The Throw Saddle)
- Yield: 1
- One-line description: A stylish holder for throws, perfect for your sofa.
- Materials List:
- Medium weight yarn (Linen - 200 yards, Slate Gray - 100 yards)
- 1/2 inch wooden buttons - 2
- Stitch markers - 2
- Tapestry needle
- Tools List:
- 5.5 mm (I/9) and 6.0 mm (J/10) crochet hooks
- Scissors
- Pins for blocking
- Instructions:
- Row 1: 34 fdc. (34 sts)
- Row 2: Ch 3, dc in each st across (34 sts)
- Row 3: Ch 1, sc in first st, ch 1, skip 1, sc across to last st, sc in the last st (17 sc, 17 ch-1 spaces)
- Row 4: Ch 3, dc across (34 sts)
- Row 5: Change to CC, ch 3, dc in first 17, ch 8, skip 1, dc in last 16 (34 sts)
- Row 6: Ch 3, dc in first 16, dc in 8 ch, dc in remaining 16 (34 sts)
- Row 7: Ch 1, sc in first 16, ch 1, skip 1 for next 8, sc in remaining 10 (17 sc, 8 ch-1 spaces)
- Rows 8-14: Repeat Rows 4-8 four more times.
- Row 15: Ch 1, sc evenly around (about 56 sc).
- Row 16: Sl st into first sc, fasten off and weave in ends.
- Notes: Take your time and enjoy making this cute addition to your home!
What's Next?
Save this for later: Be sure to save this post to Pinterest so you can easily find it again.
Leave a comment: If you have any questions or run into any snags while making your blanket holder, feel free to ask! I’m here to help, and all questions are welcome.
Share your finished project: I’d love to see your Throw Saddle! Share your work and enjoy the process! You've got this!
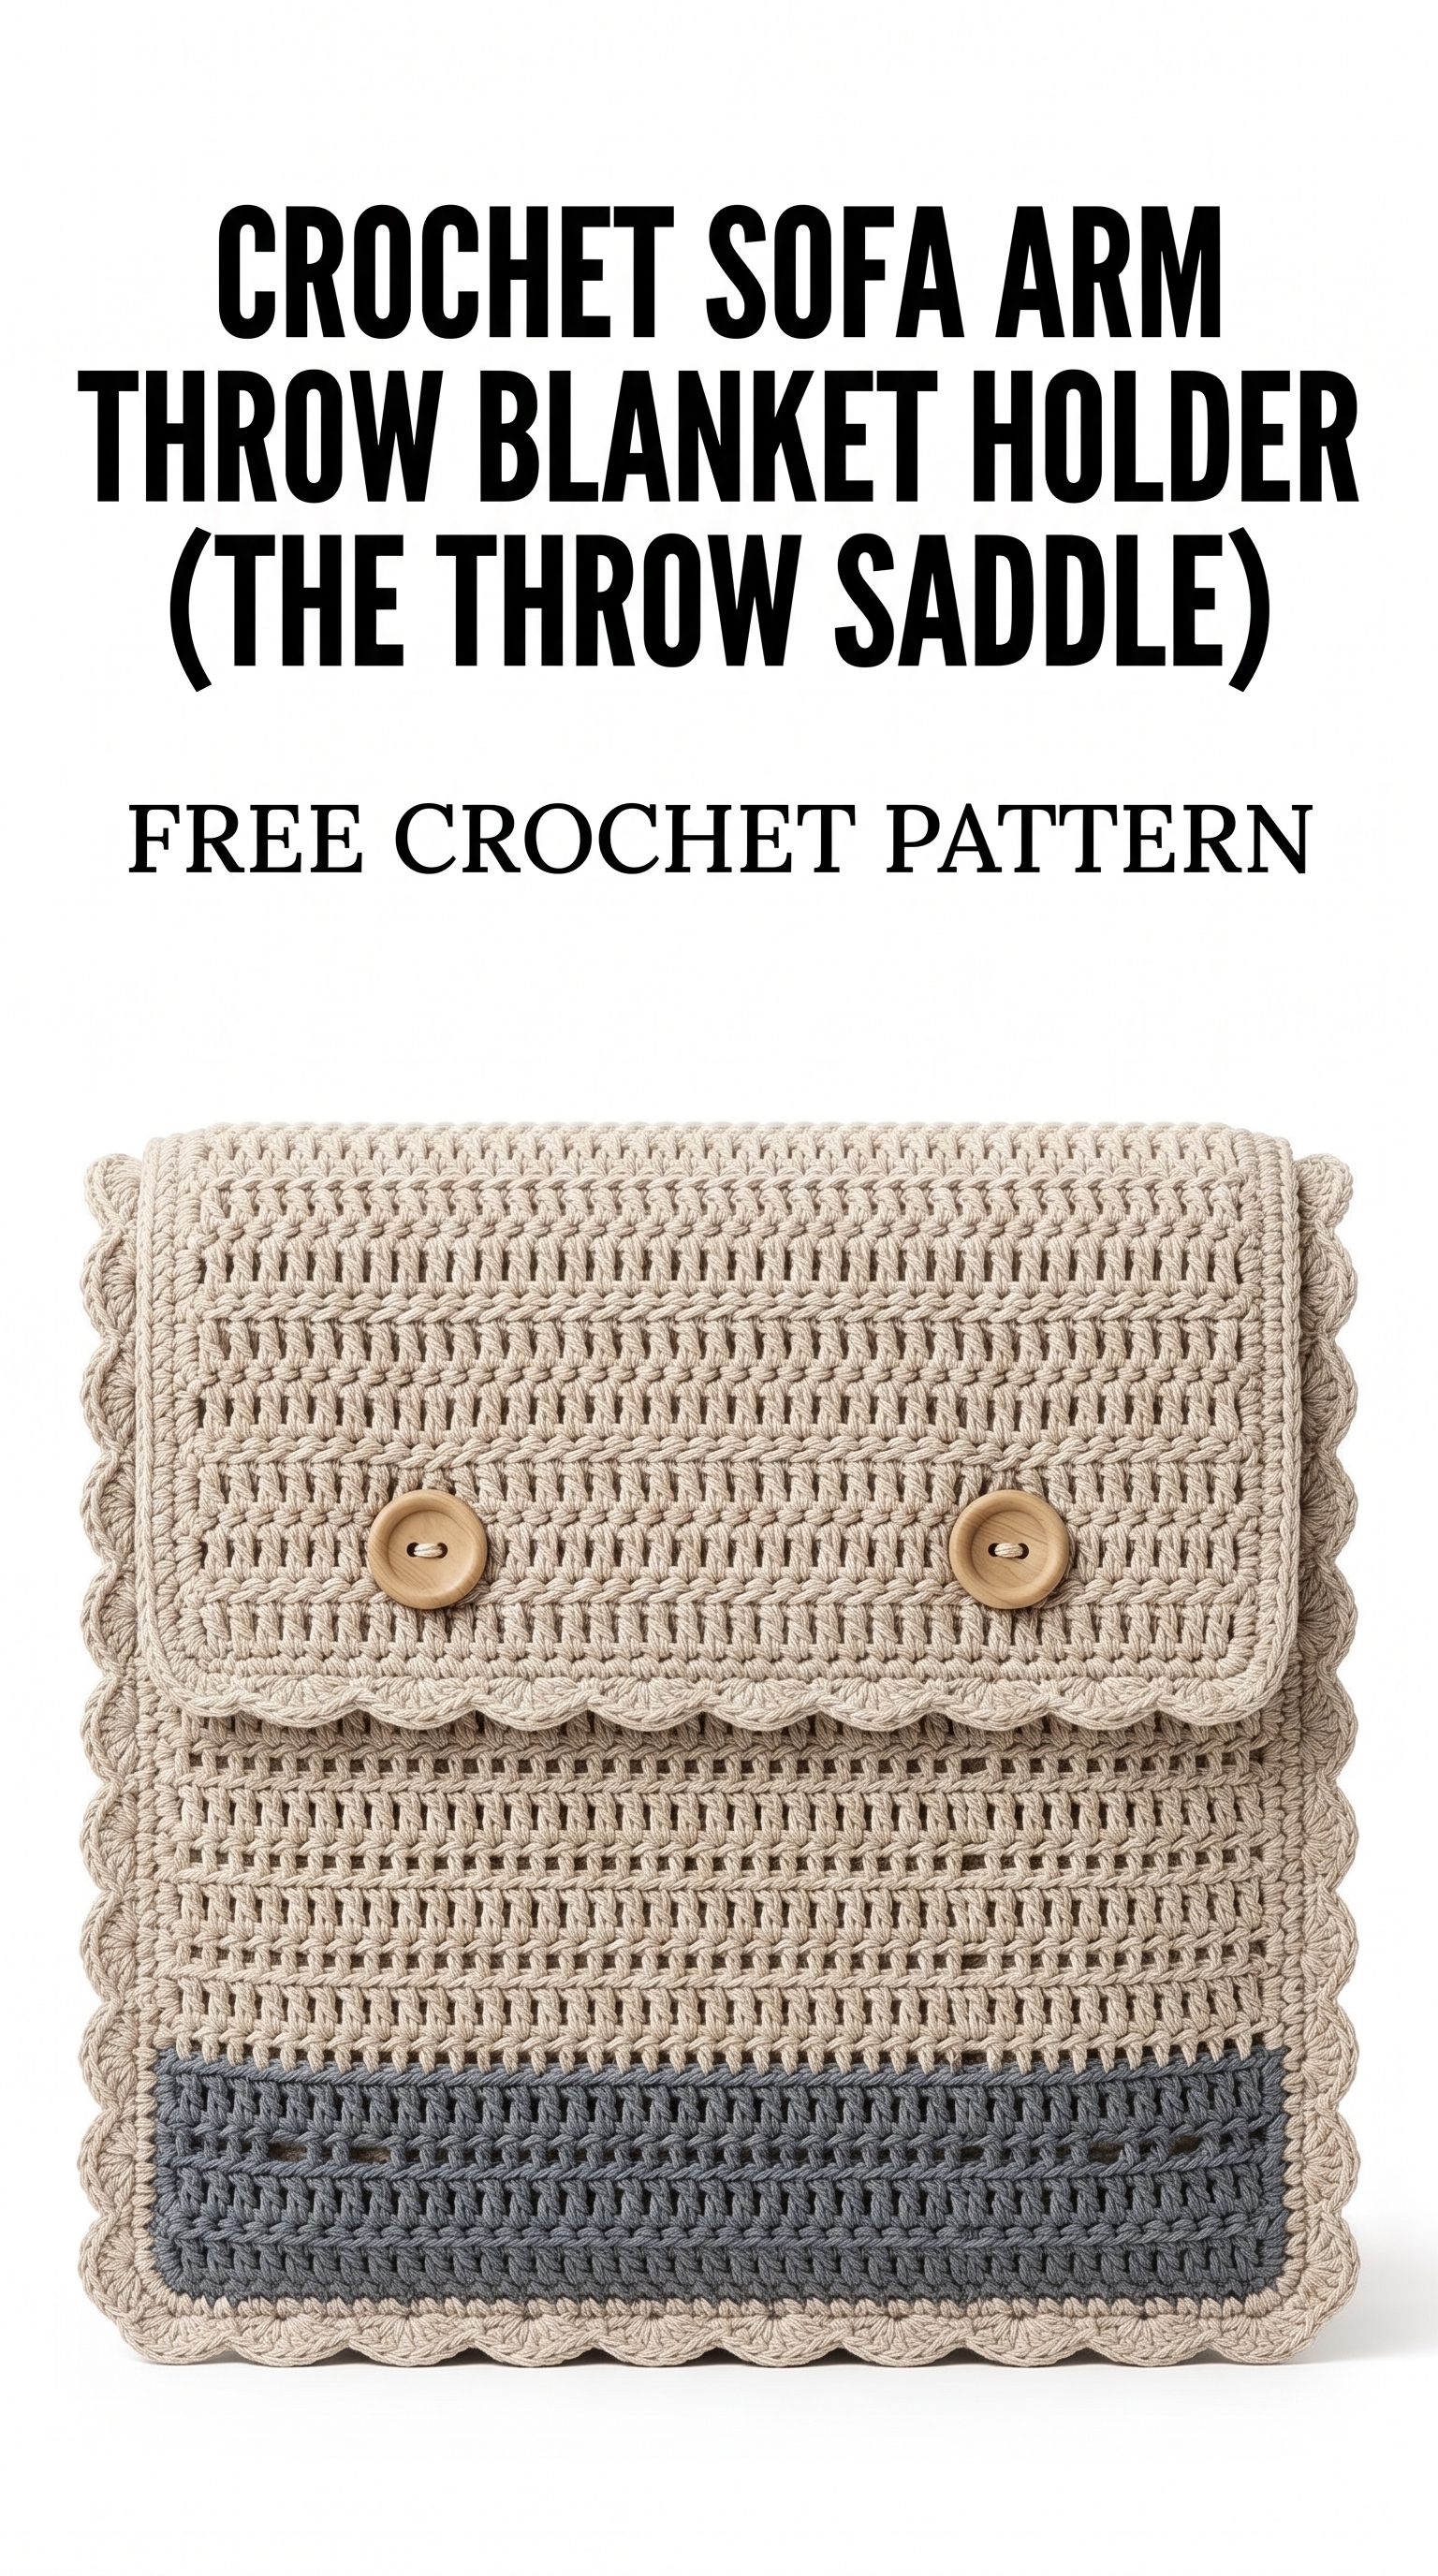
Image shown for inspiration — your finished result may vary slightly.