How to Crochet Pantry Basket With Scoop Front (The Scoop Bin)
You'll love making this crochet pantry basket with a scoop-shaped front! It's perfect for easily accessing your kitchen or craft supplies. Don’t worry if you’re new to crocheting; I’ll guide you through this simple project step by step.
Published October 5, 2026 · by Lina
- Skill level
- Beginner
- Yarn weight
- Worsted weight
- Hook size
- 5.5 mm (US size I/9)
- Time
- Approximately 4 hours
- Sizes
- Approximately 12” wide x 8” tall x 8” deep (30 cm x 20 cm x 20 cm)
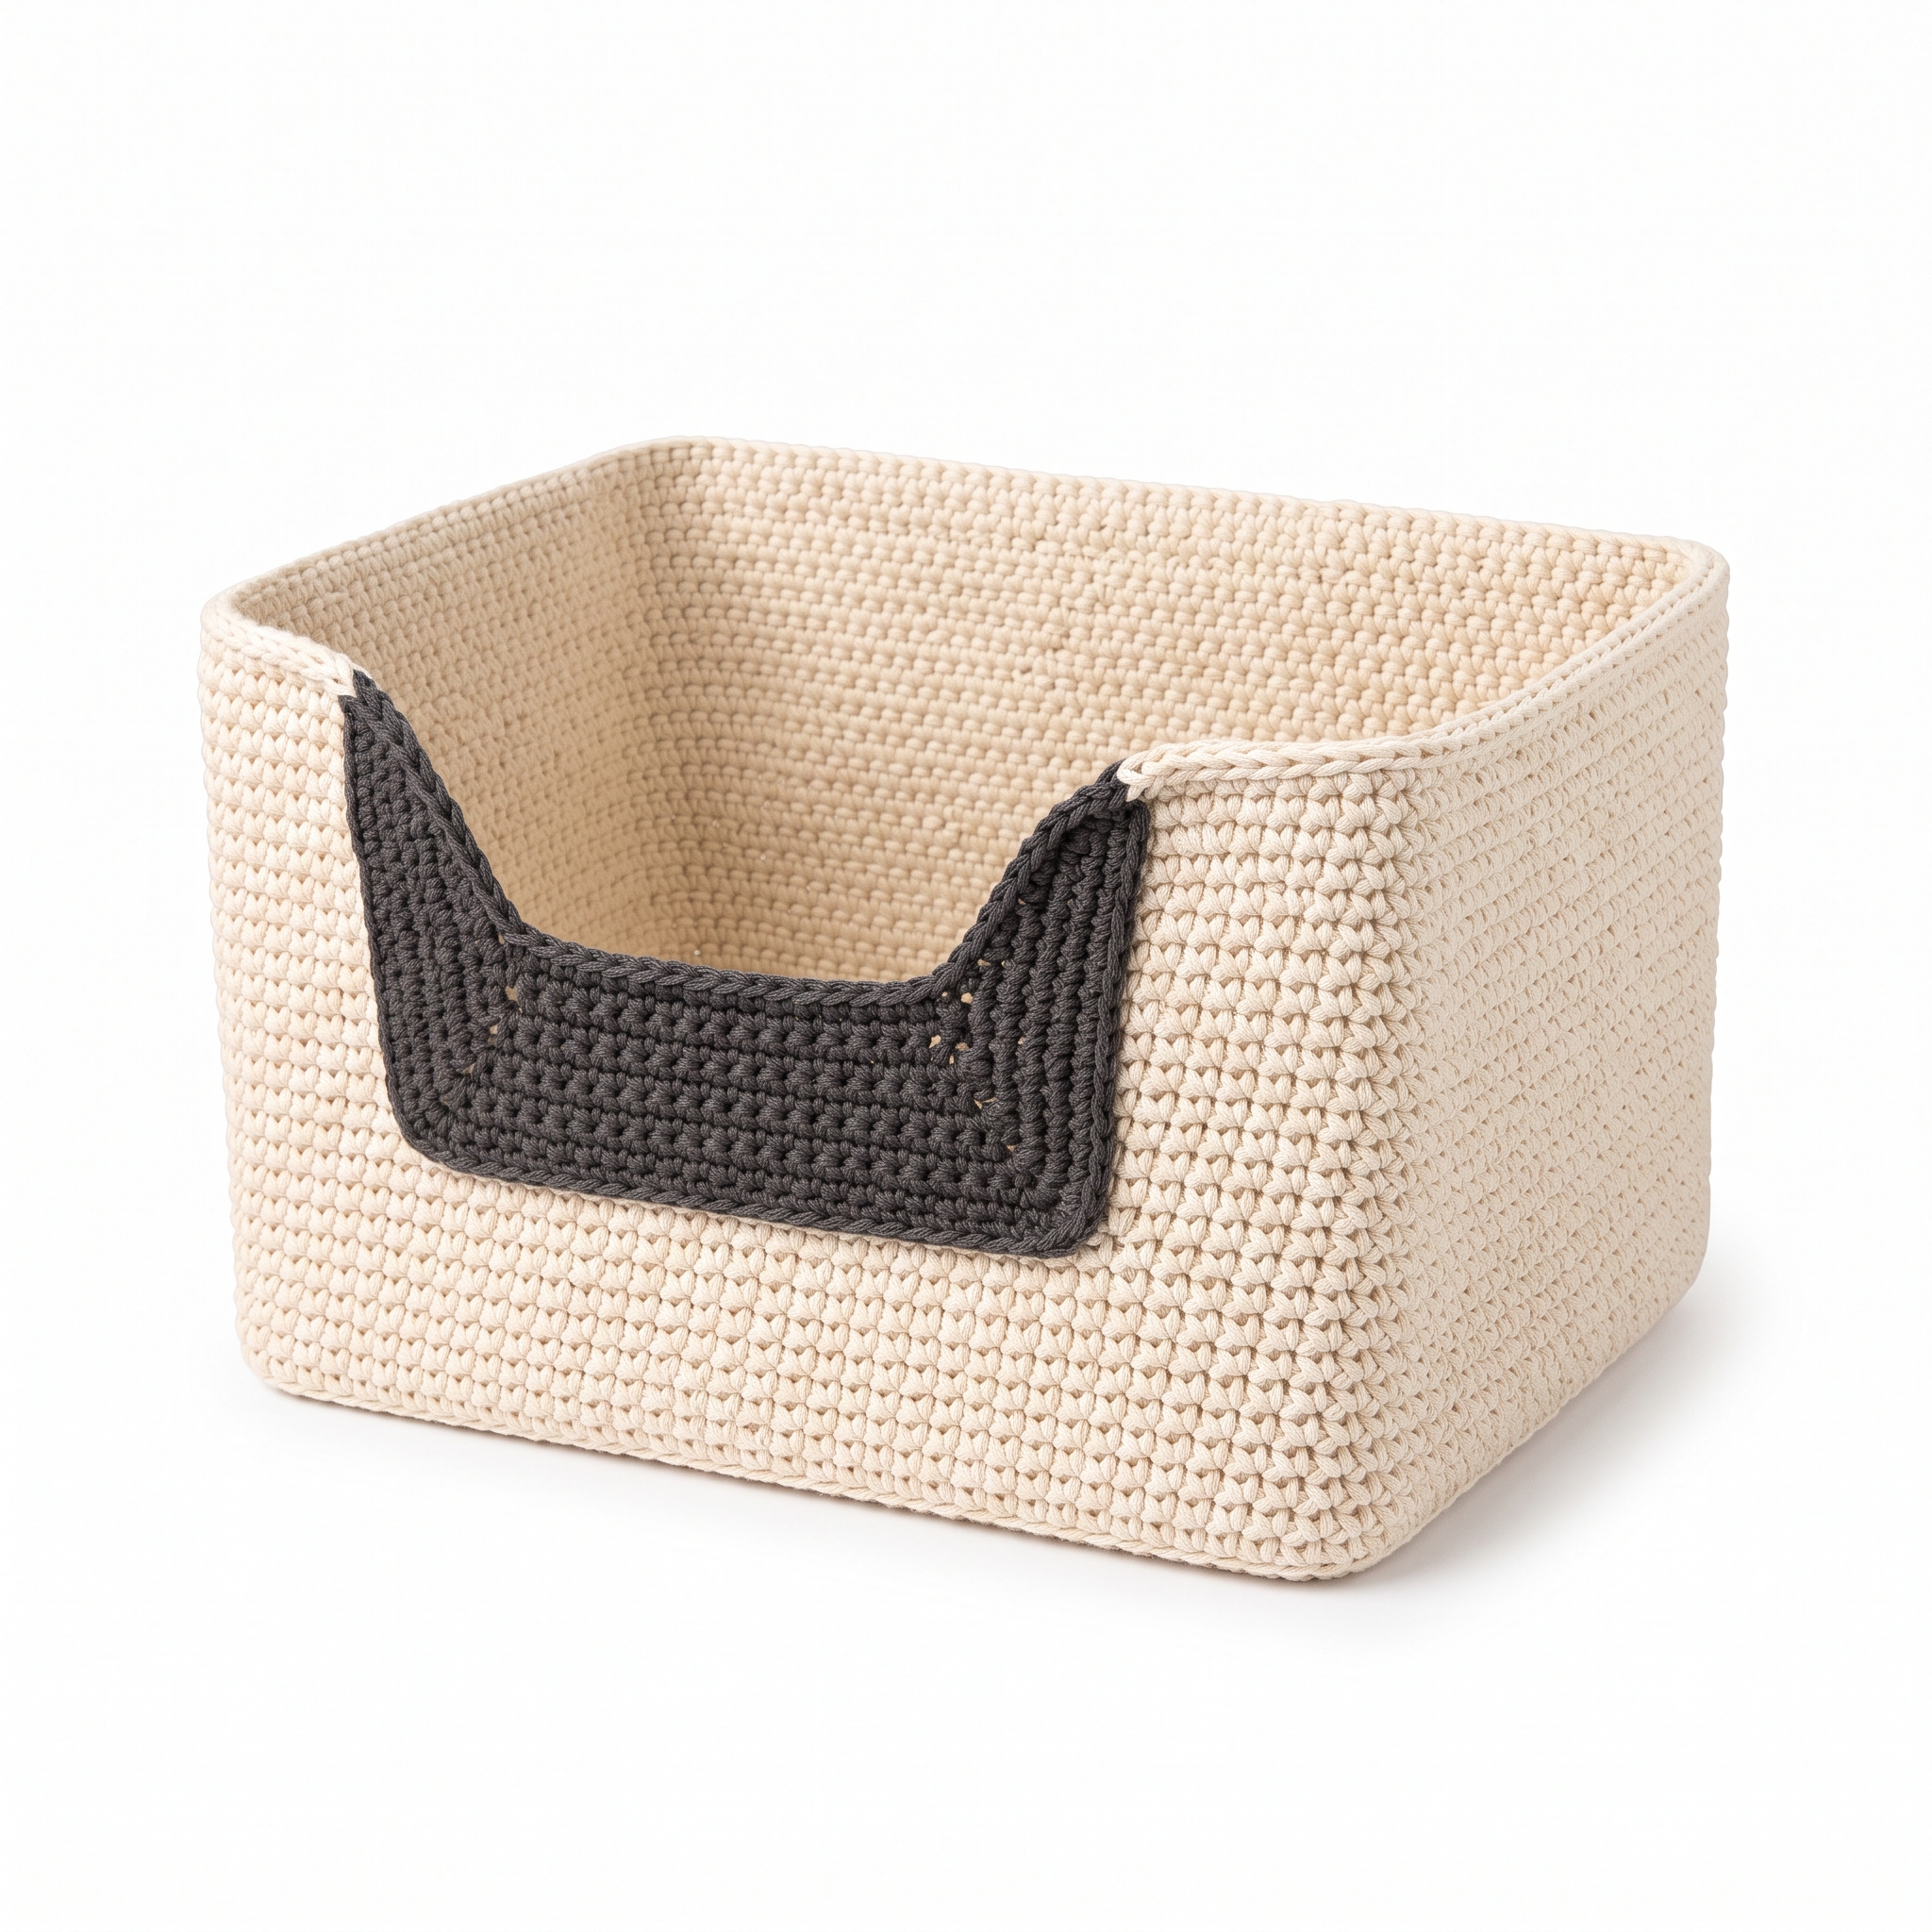
You'll love making this crochet pantry basket with a scoop-shaped front! It's perfect for easily accessing your kitchen or craft supplies. Don’t worry if you’re new to crocheting; I’ll guide you through this simple project step by step.
HERO IMAGE PLACEHOLDER
WHY YOU'LL LOVE THIS PATTERN
This pattern is excellent for beginners because it uses basic stitches and techniques. You'll not only learn how to crochet a useful item, but you'll also enjoy the satisfying feeling of creating something functional and stylish for your home. It typically takes about 4 hours to complete, so you'll have a lovely basket ready in no time!
IN THIS POST
- What You'll Need
- Stitches You'll Use in This Pattern
- Pattern Details
- Abbreviations
- Step-By-Step Instructions
- Assembly & Finishing
- Measurements & Dimensions
- Timing Information
- Variations & Notes
What You'll Need
Yarn:
- Worsted weight (Medium; 4) — This is a medium-thickness yarn, which is easy to see and work with.
- Colors:
- Color A: "Natural" (approx. 200 yards/183 meters)
- Color B: "Charcoal" (approx. 100 yards/91 meters)
Crochet Hook:
- 5.5 mm (US size I/9) — This hook size is just right for working with worsted weight yarn.
Stitch Markers (optional but helpful):
- These are used to mark important points in your work, like the beginning of rounds.
Scissors:
- For cutting your yarn when you finish or need to change colors.
Yarn/Tapestry Needle:
- This needle is used for weaving in loose ends and finishing off your work.
Fiberfill or Similar Stuffing (optional):
- If you want to soften the edges of your basket.
Stitches You'll Use in This Pattern
Chain (ch):
- To create a chain stitch, simply yarn over (wrap the yarn around your hook) and pull through the loop on your hook. This stitch creates the foundation of your project.
Single Crochet (sc):
- Insert your hook into the stitch, yarn over, pull up a loop (you now have two loops on your hook), yarn over again and pull through both loops. This creates a solid fabric.
Slip Stitch (sl st):
- Insert your hook into the stitch, yarn over, and pull the yarn through both the stitch and the loop on your hook. This stitch is used to join or move to another part of your work without adding height.
Pattern Details
- Skill Level: Beginner
- Finished Size: Approximately 12” wide x 8” tall x 8” deep (30 cm x 20 cm x 20 cm)
- Time to Complete: Approximately 4 hours
- Yarn Amounts:
- Color A: 200 yards (183 meters)
- Color B: 100 yards (91 meters)
- Terms: This pattern uses US crochet terms.
Abbreviations
- ch = chain
- sc = single crochet
- sl st = slip stitch
- st(s) = stitch(es)
- rnd = round
- ( ) = work instructions in parentheses as indicated
Let's Get Started: Full Pattern Instructions
Base
- Ch 20.
- Row 1: Sc in 2nd ch from hook and in each ch across. (19 sc)
- Row 2: Ch 1, turn, sc in each sc across. (19 sc)
- Repeat Row 2 until the base measures 12” (30 cm) from the beginning. This will be approximately 10 rows total.
Sides
- Row 11: Ch 1, sc in each st across. (19 sc)
- Row 12: Ch 1, turn; sc in first 9 sts, ch 5, skip next 5 sts, sc in last 5 sts. (19 sc + 5 ch)
- Row 13-20: Ch 1, turn; sc in each st across. (19 sc)
After Row 20, the height should measure approximately 8” (20 cm) from the base.
Scoop Front
- Row 21: Ch 1, turn; sc in first 9 sts, ch 5, sc in the ch-5 space (this creates the scoop shape), sc in last 5 sts. (19 sc + 5 ch)
- Row 22-26: Repeat Row 21.
Finishing Edging
- Make edge: Ch 1 and sc evenly around the entire top edge of the basket. Ensure to sc around the scoop. Join with a sl st to the first sc.
You can optionally stuff the edges with fiberfill for added shape and firmness at this point.
Assembly & Finishing
- Weave in all ends using the tapestry needle. This means threading the loose ends through the fabric to hide them.
- If desired, lightly block the basket by wetting it and shaping it into your desired form and drying it flat. This helps the basket keep its shape.
- The scoop front feature should allow easy access to pantry items or craft supplies.
Measurements & Dimensions
- Final dimensions of the basket: approximately 12” wide x 8” tall x 8” deep (30 cm x 20 cm x 20 cm).
Timing Information
- Estimated working time:
- Base: 1.5 hours
- Sides and scoop: 2 hours
- Finishing: 30 minutes
- Total: Approximately 4 hours.
Variations & Notes
- Color variations: Feel free to use any colors you like for your pantry basket to match your kitchen decor.
- Common mistakes to avoid: Be careful not to skip any of the chain stitches when creating the scoop front. It’s crucial for forming the shape. Also, ensure you are crocheting tightly but comfortably to keep your basket sturdy.
- Care instructions: Hand wash or machine wash on a gentle cycle; lay flat to dry to maintain its shape.
FULL RECIPE-CARD-STYLE SUMMARY BOX
- Title: Crochet Pantry Basket With Scoop Front (The Scoop Bin)
- Yield: 1
- One-line description: Create a stylish and functional pantry basket with an easy-access scoop front.
- Full materials list:
- Worsted weight cotton yarn (200 yards of Color A: "Natural", 100 yards of Color B: "Charcoal")
- 5.5 mm crochet hook
- Stitch markers (2)
- Tapestry needle (1)
- Optional stuffing
- Scissors
- Full numbered instructions:
- Ch 20.
- Row 1: sc in 2nd ch from hook and each ch across. (19 sc)
- Row 2: ch 1, turn, sc in each sc across. (19 sc)
- Repeat Row 2 until the base measures 12” (30 cm).
- Row 11: ch 1, sc in each st across. (19 sc)
- Row 12: ch 1, turn; sc in first 9 sts, ch 5, skip next 5 sts, sc in last 5 sts. (19 sc + 5 ch)
- Row 13-20: ch 1, turn; sc in each st across. (19 sc)
- Row 21: ch 1, turn; sc in first 9 sts, ch 5, sc in ch-5 space, sc in last 5 sts. (19 sc + 5 ch)
- Row 22-26: Repeat Row 21.
- Ch 1, sc around top edge, join with sl st.
- Notes: Optionally stuff edges before finishing.
What's Next?
- Save this for later: Don’t forget to save this post to Pinterest for easy access when you want to make your own pantry basket!
- Leave a comment: If you have any questions while making this project, please leave a comment! I’m here to help, and your questions are always welcome.
- Share your finished project: I’d love to see your finished basket! Feel free to share your creation; there’s no pressure, but I’m excited to celebrate your work with you!
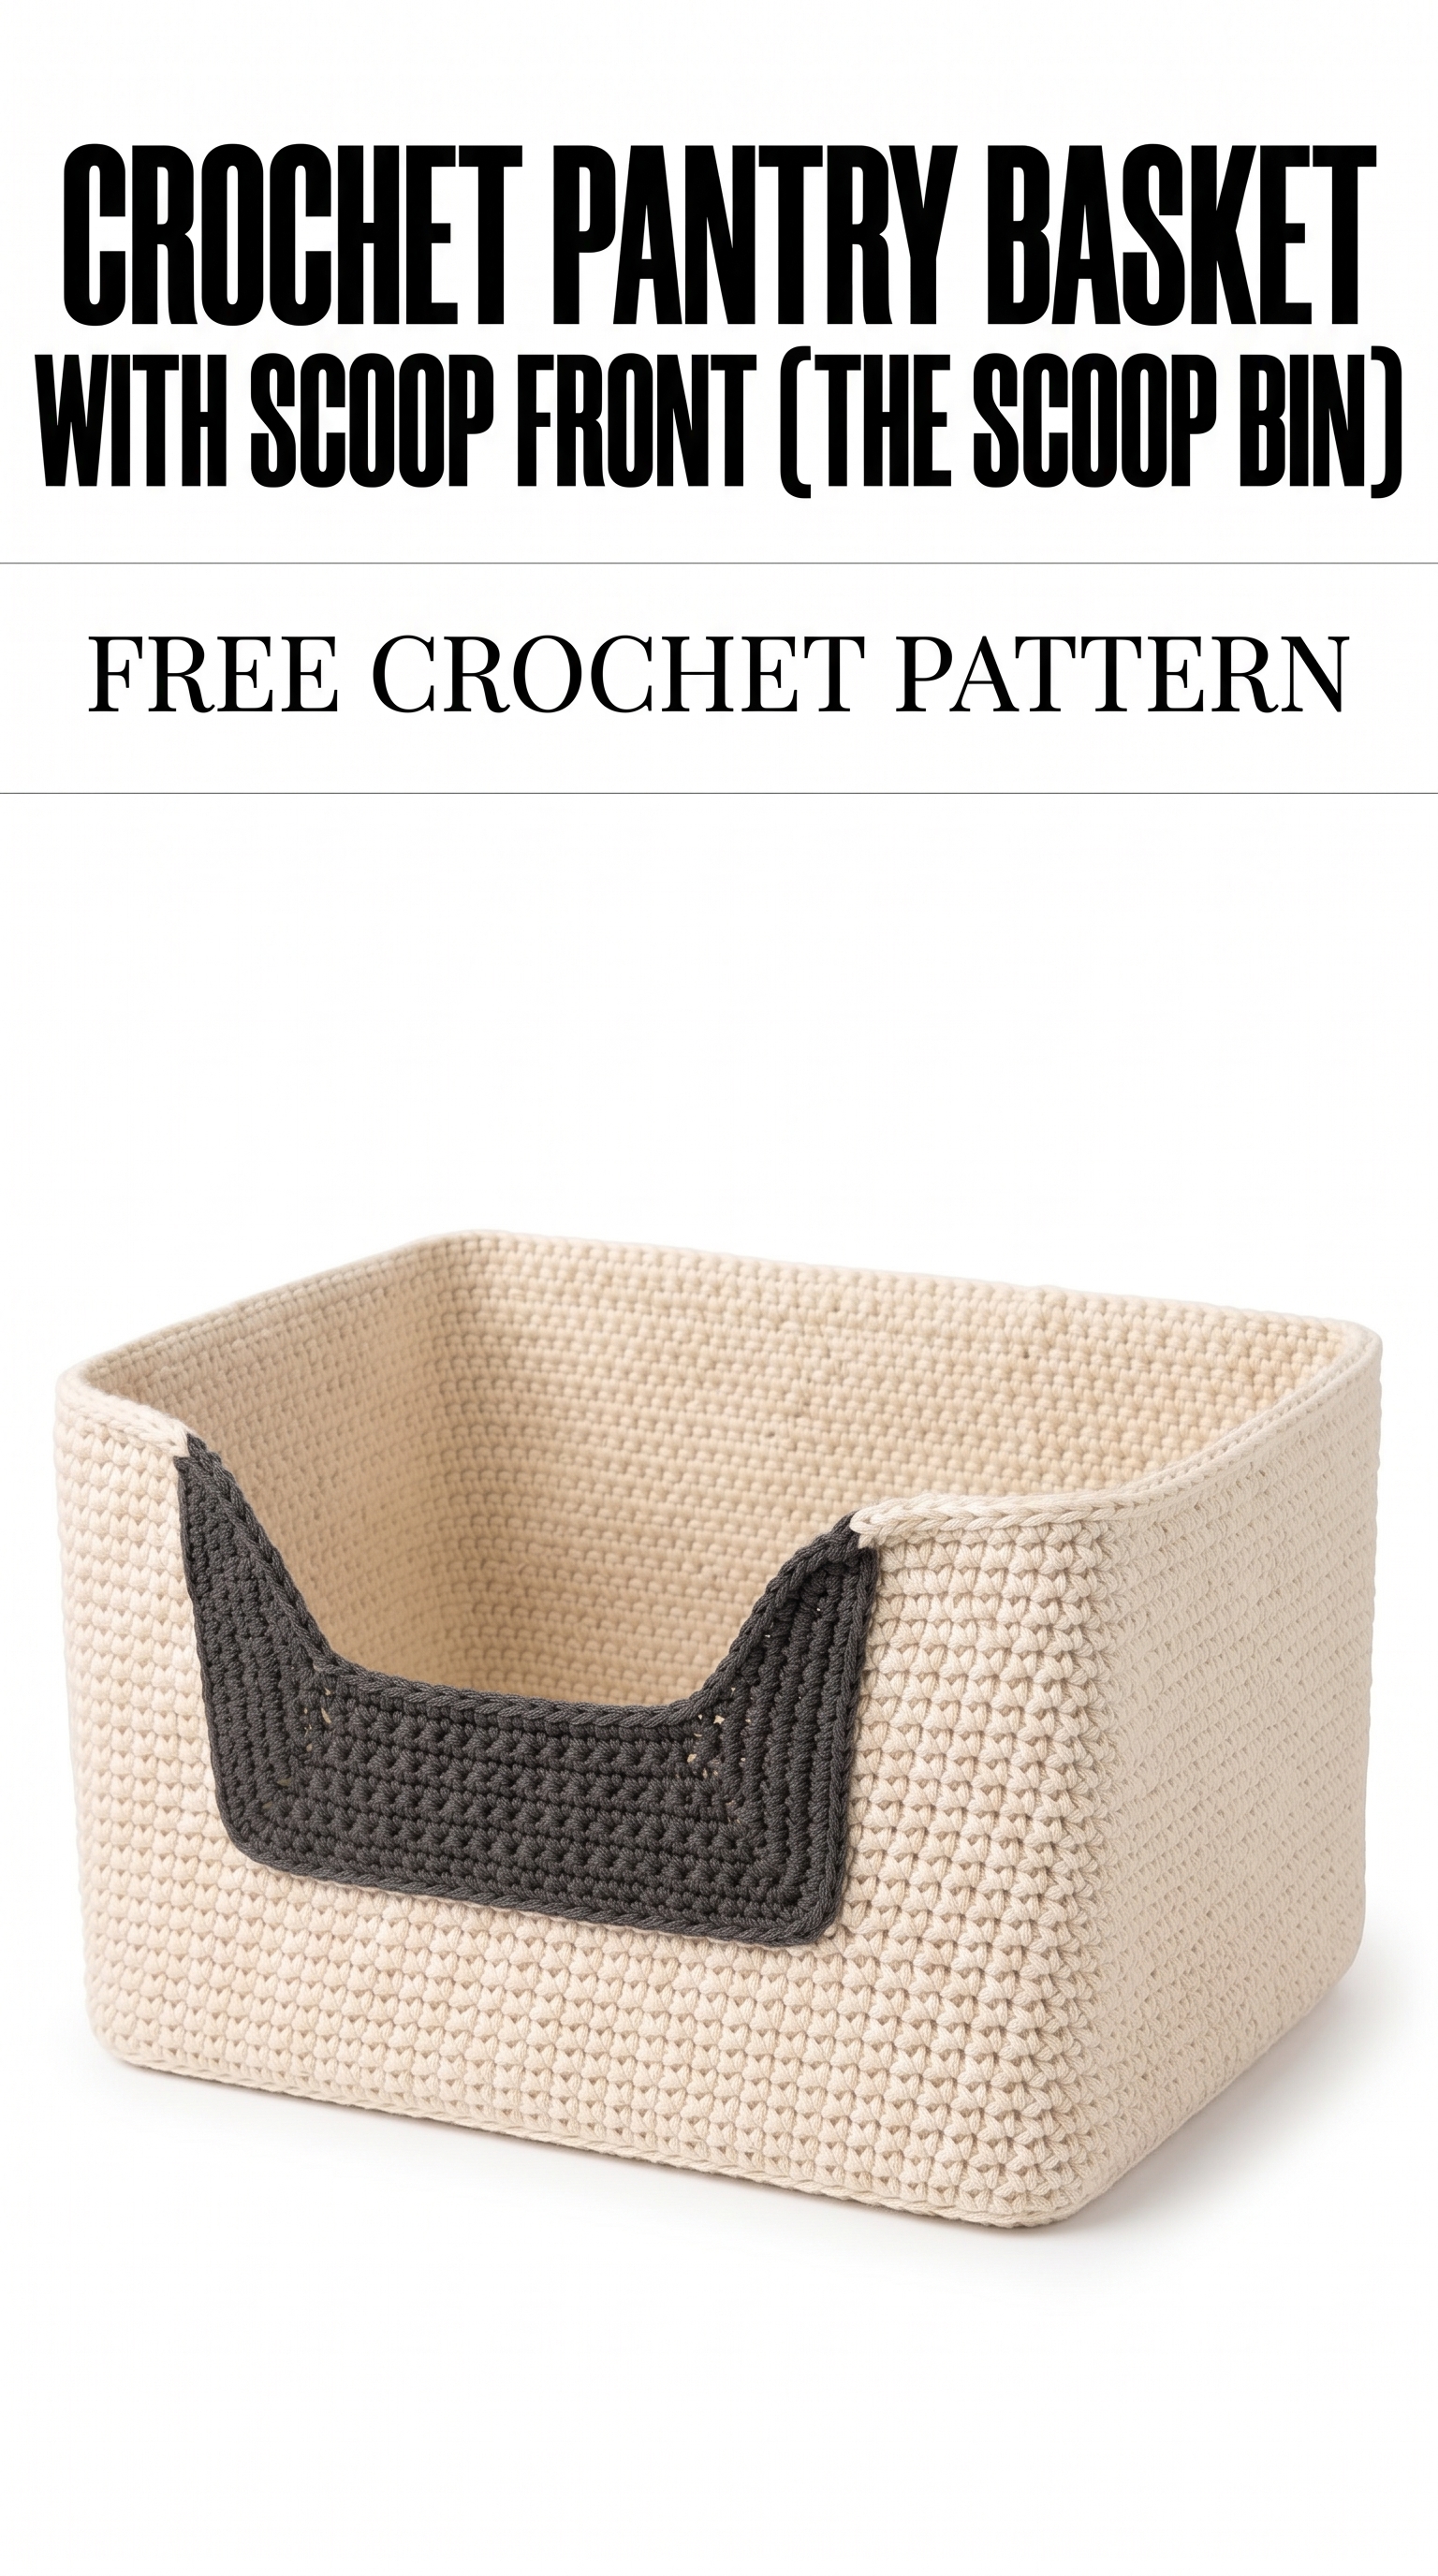
Image shown for inspiration — your finished result may vary slightly.