How to Crochet the Alpine Stitch for a Cushion Cover
Welcome! Today, I’ll show you how to make a lovely cushion cover using the alpine stitch. This stitch creates a beautiful, textured pattern that will bring a cozy touch to your home. Plus, it's a fun project for those who want to dive into a more intermediate skill level!
Published October 5, 2026 · by Lina
- Skill level
- Intermediate
- Yarn weight
- Worsted weight
- Hook size
- 5.5 mm (I/9)
- Yardage
- Approximately 300 yards each of Color A and Color B.
- Sizes
- 18 inches x 18 inches (45.72 cm x 45.72 cm)
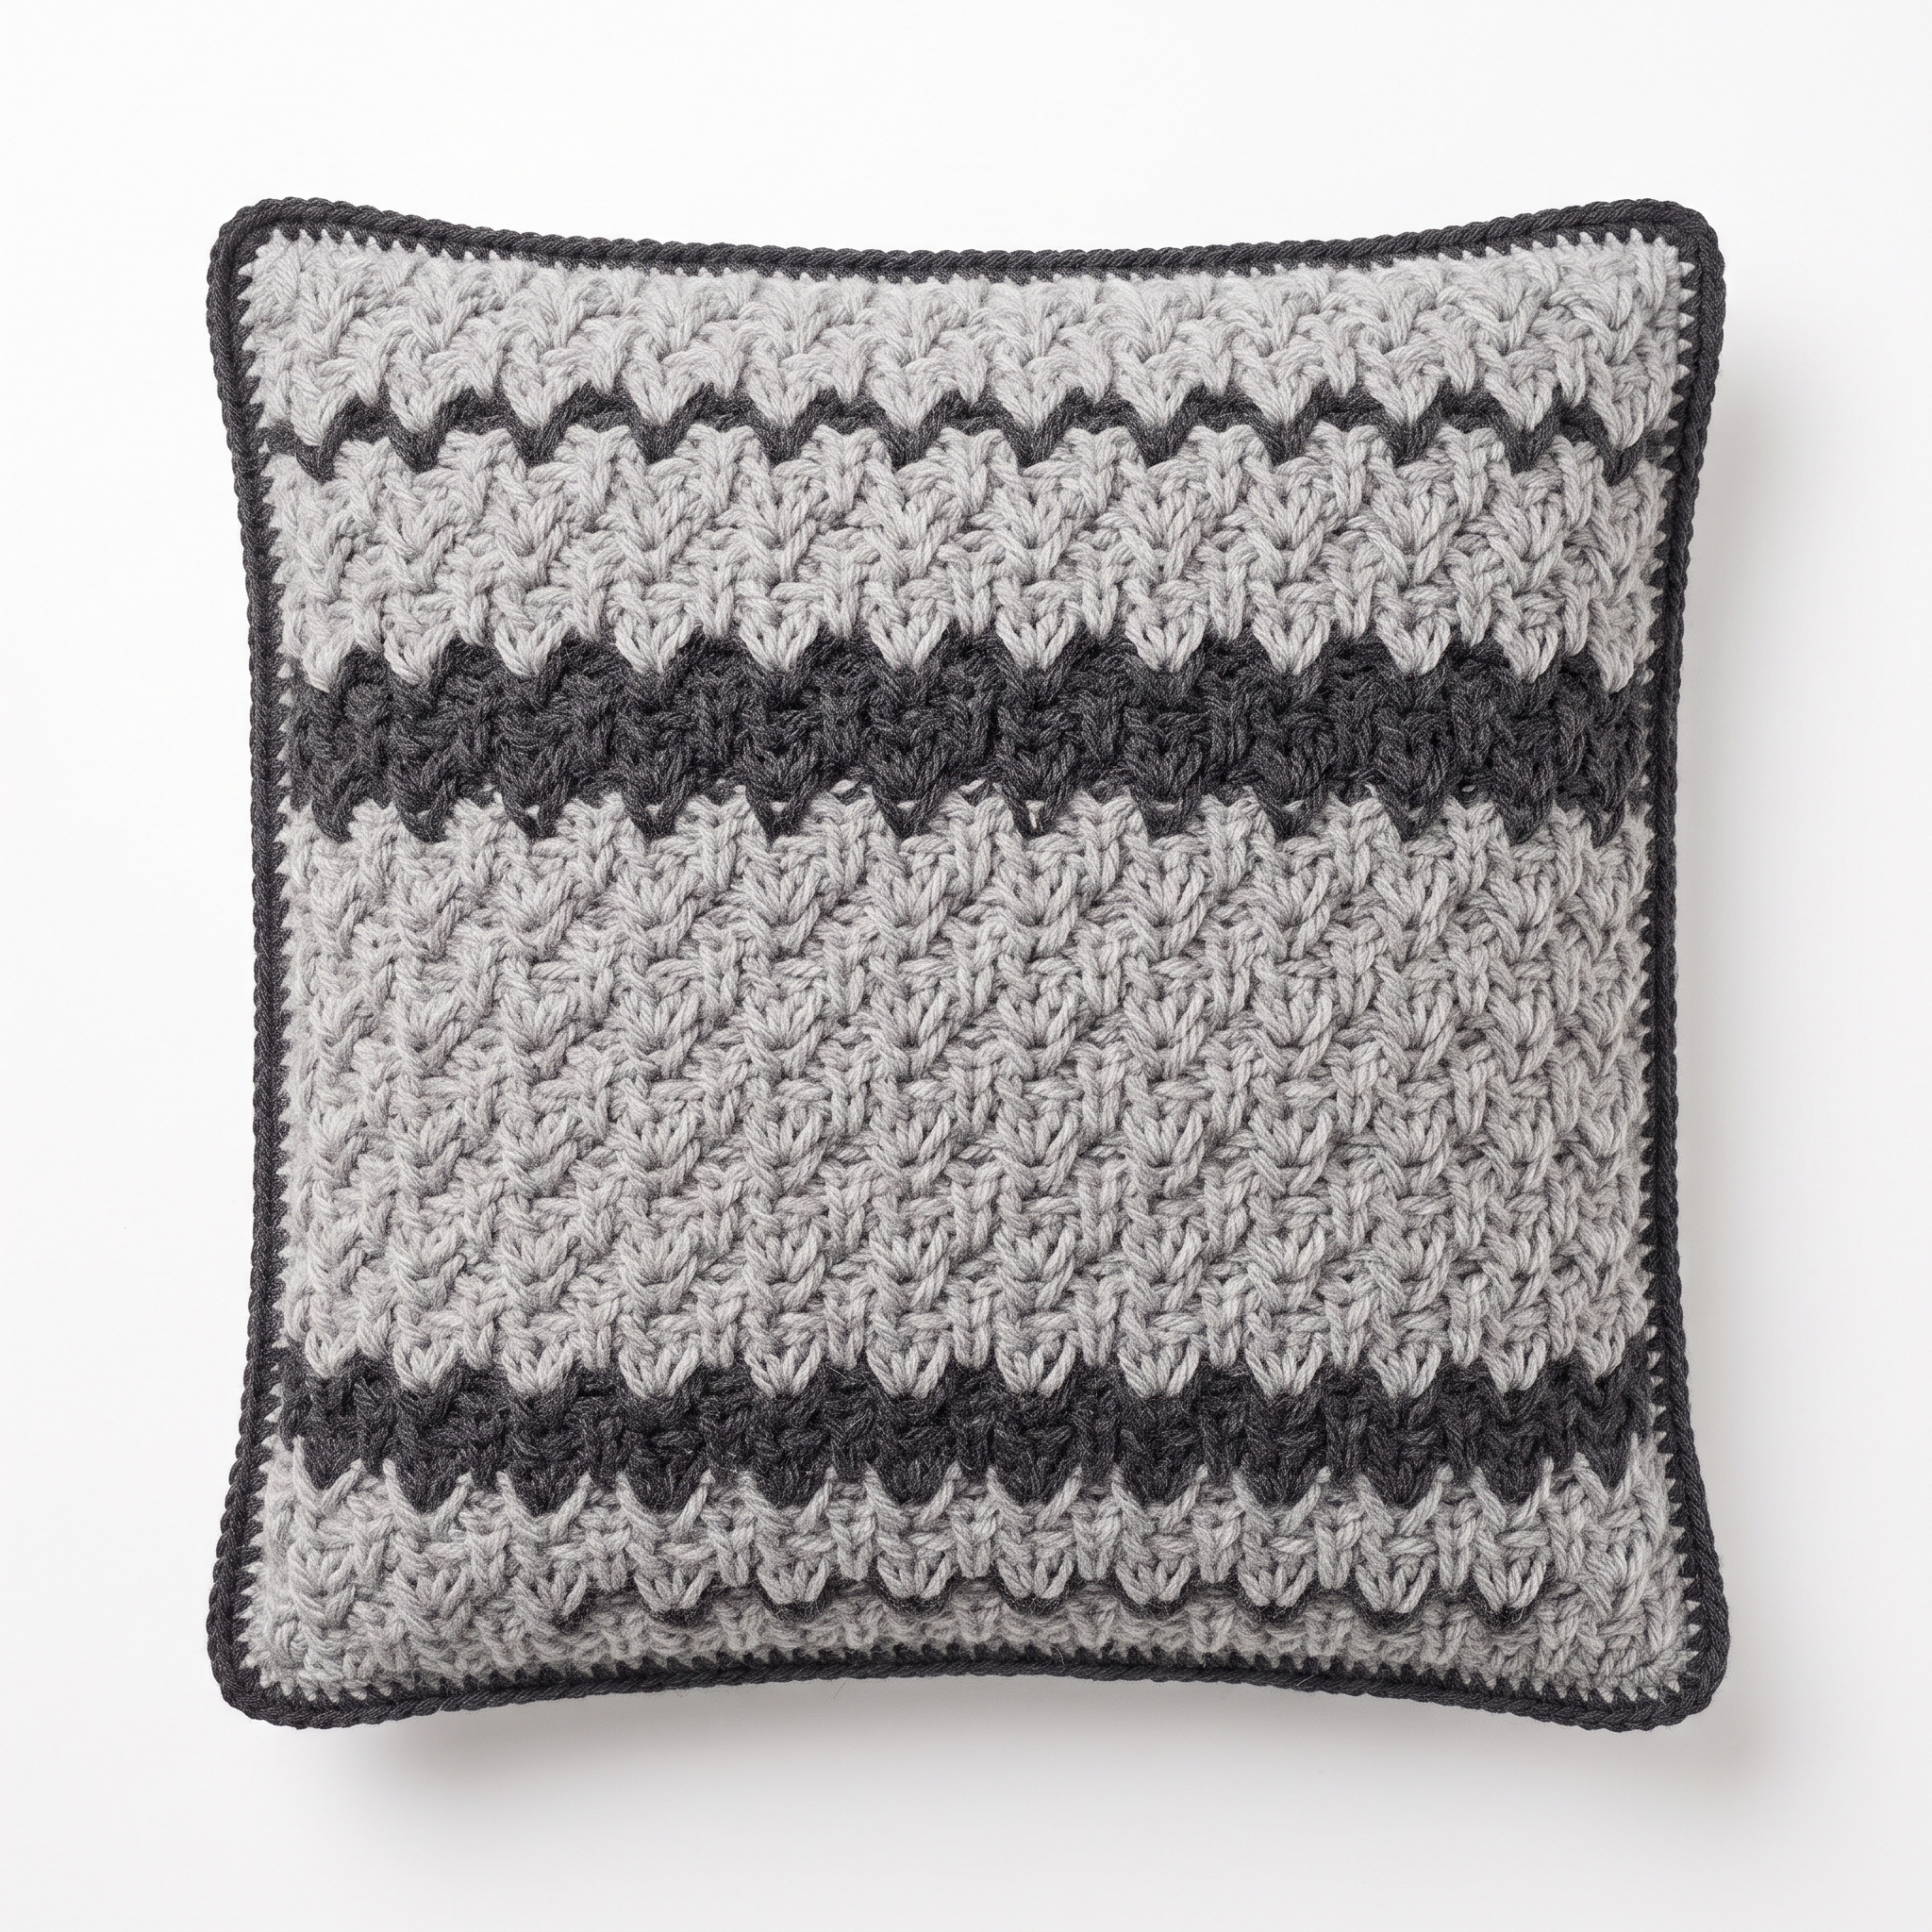
Welcome! Today, I’ll show you how to make a lovely cushion cover using the alpine stitch. This stitch creates a beautiful, textured pattern that will bring a cozy touch to your home. Plus, it's a fun project for those who want to dive into a more intermediate skill level!
[Descriptive image caption of the finished piece]
Why You'll Love This Pattern
This cushion cover is perfect for beginners ready to level up. The alpine stitch is so satisfying to work with—watching the texture come to life is a joy! You can whip this cover up in just a few hours, and it’s a great way to practice your crochet skills. You’ve got this!
In This Post
- What You'll Need
- Stitches You'll Use in This Pattern
- Pattern Details
- Abbreviations
- Special Stitches
- Let's Get Started: Full Pattern Instructions
- Assembly / Putting It All Together
- Finishing
- Full Summary Box
- What's Next?
What You'll Need
- Yarn:
- Worsted weight (Category 4): This is a medium-thickness yarn that is easy to work with and see your stitches.
- Colors:
- Color A: Light Gray (Approx. 300 yards)
- Color B: Charcoal (Approx. 300 yards)
- Crochet Hook:
- 5.5 mm (I/9) — This size is perfect for worsted weight yarn.
- Stitch Markers (optional but helpful):
- These can help keep track of your rows and stitches.
- Scissors:
- To cut your yarn.
- Yarn/Tapestry Needle:
- This is used for weaving in the ends of your yarn when you’re finished.
- 1 Cushion Insert:
- An 18 inches x 18 inches insert to stuff your cushion cover.
Stitches You'll Use in This Pattern
- ch: chain — This creates the initial loops to start your work.
- sc: single crochet — Insert your hook into the stitch, yarn over, pull up a loop, yarn over again, and pull through both loops on the hook.
- dc: double crochet — Yarn over, insert the hook into the stitch, yarn over again, pull up a loop (3 loops on hook), yarn over, pull through the first two loops (2 loops remain), yarn over, pull through the last two loops.
- ALPINE STITCH: This is worked as follows: In the next stitch, do 1 double crochet (dc), then 1 dc in the same stitch, and finally 1 dc in the stitch before the one just worked. This creates a layered effect that forms the textured look.
Pattern Details
- Skill Level: Intermediate
- Finished Size: 18 inches x 18 inches (45.72 cm x 45.72 cm)
- Estimated Time to Complete: 4-5 hours
- Yarn Amounts: Approximately 300 yards each of Color A and Color B.
- Terms: This pattern uses US crochet terms.
Abbreviations
- ch = chain
- sc = single crochet
- dc = double crochet
- ALPINE STITCH = (1 dc in next st, 1 dc in the same st, 1 dc in the st before the one just worked)
Special Stitches
Alpine Stitch
- Yarn over and insert the hook into the next stitch.
- Yarn over again and pull up a loop (you now have 3 loops on your hook).
- Yarn over and pull through the first two loops (you now have 2 loops on your hook).
- Yarn over again and pull through the last two loops (you have completed your first double crochet).
- In the same stitch, repeat steps 1-4 for another double crochet.
- Now, insert your hook into the stitch before the one you just worked.
- Yarn over and pull up a loop, then yarn over and pull through the first two loops. Finally, yarn over and pull through the last two loops.
Let's Get Started: Full Pattern Instructions
Foundation Chain
- Foundation Chain: Ch 46. This creates a foundation that is a multiple of 4 plus 2.
Row 1: Base Row
- Row 1: Starting in the 2nd ch from the hook, sc in each ch across. (45 sc)
Transition to Alpine Stitch
- Rows 2 - 24: Switch to alpine stitch.
- Row 2: Ch 3 (counts as the first dc), skip the first stitch, [ALPINE STITCH] in the next stitch, repeat from * to * until 1 stitch remains. Finish with 1 dc in the last stitch. (46 sts total)
- Row 3: Ch 3, ALPINE STITCH in the stitch after the 1st dc from the previous row, repeat across until the last stitch, finish with dc in the last stitch. (46 sts total)
- Repeat Rows 2 and 3 for a total of 22 more rows until your work measures approximately 18 inches tall.
Closing the Cushion Cover
- Final Rows:
- Row 25: Ch 1, sc in each stitch across. (46 sc)
- Row 26: Ch 1, sc in each stitch across. (46 sc)
Assembly / Putting It All Together
- Fold your completed panel in half, matching the short ends so that the right sides are together.
- With right sides together, sc along the edges to join, leaving one side open (this will be the side where you insert the cushion).
- Turn the cushion cover inside out so the seam is hidden.
- Insert the cushion into the cover, and adjust as needed.
Finishing
Weave in Ends
- Using your tapestry needle, thread the tails of yarn through the stitches at the back of your project. This hides the ends so your cushion cover looks neat.
Blocking (optional)
- Blocking is a process that helps to shape your crochet project. If you’d like, gently wash your cushion cover and lay it flat to dry. This might help even out the stitches and give it a nice finish.
Full Recipe-Card-Style Summary Box
- Title: How to Crochet the Alpine Stitch for a Cushion Cover
- Yield: 1
- One-line description: A beautiful and textured cushion cover using the alpine stitch.
- Full materials list:
- 300 yards of Light Gray yarn
- 300 yards of Charcoal yarn
- 1 cushion insert (18 in x 18 in)
- Full tools list:
- 5.5 mm (I/9) crochet hook
- Tapestry needle
- Stitch markers
- Scissors
- Measuring tape
- Full numbered instructions:
- Ch 46.
- Row 1: Starting in 2nd ch from hook, sc in each ch across. (45 sc)
- Row 2: Ch 3, sk 1 st, [ALPINE STITCH] in next st, dc in last st. (46 sts)
- Row 3: Ch 3, ALPINE STITCH in st after 1st dc, dc in last st. (46 sts)
- Repeat Rows 2 and 3 for 22 more rows.
- Row 25: Ch 1, sc in each st across. (46 sc)
- Row 26: Ch 1, sc in each st across. (46 sc)
- Fold and sc edges to join, leaving one side open. Turn inside out and insert cushion.
- Notes: Consider alternating colors for a fun look.
What's Next?
Save this for later: If you enjoyed this pattern, make sure to save or pin this post so you can come back to it whenever you feel like crocheting!
Leave a comment: If you have any questions or get stuck anywhere, feel free to ask! I’m here to help you.
Share your finished project: I’d love to see your cushion cover! Don’t hesitate to share your finished piece. Happy crocheting!
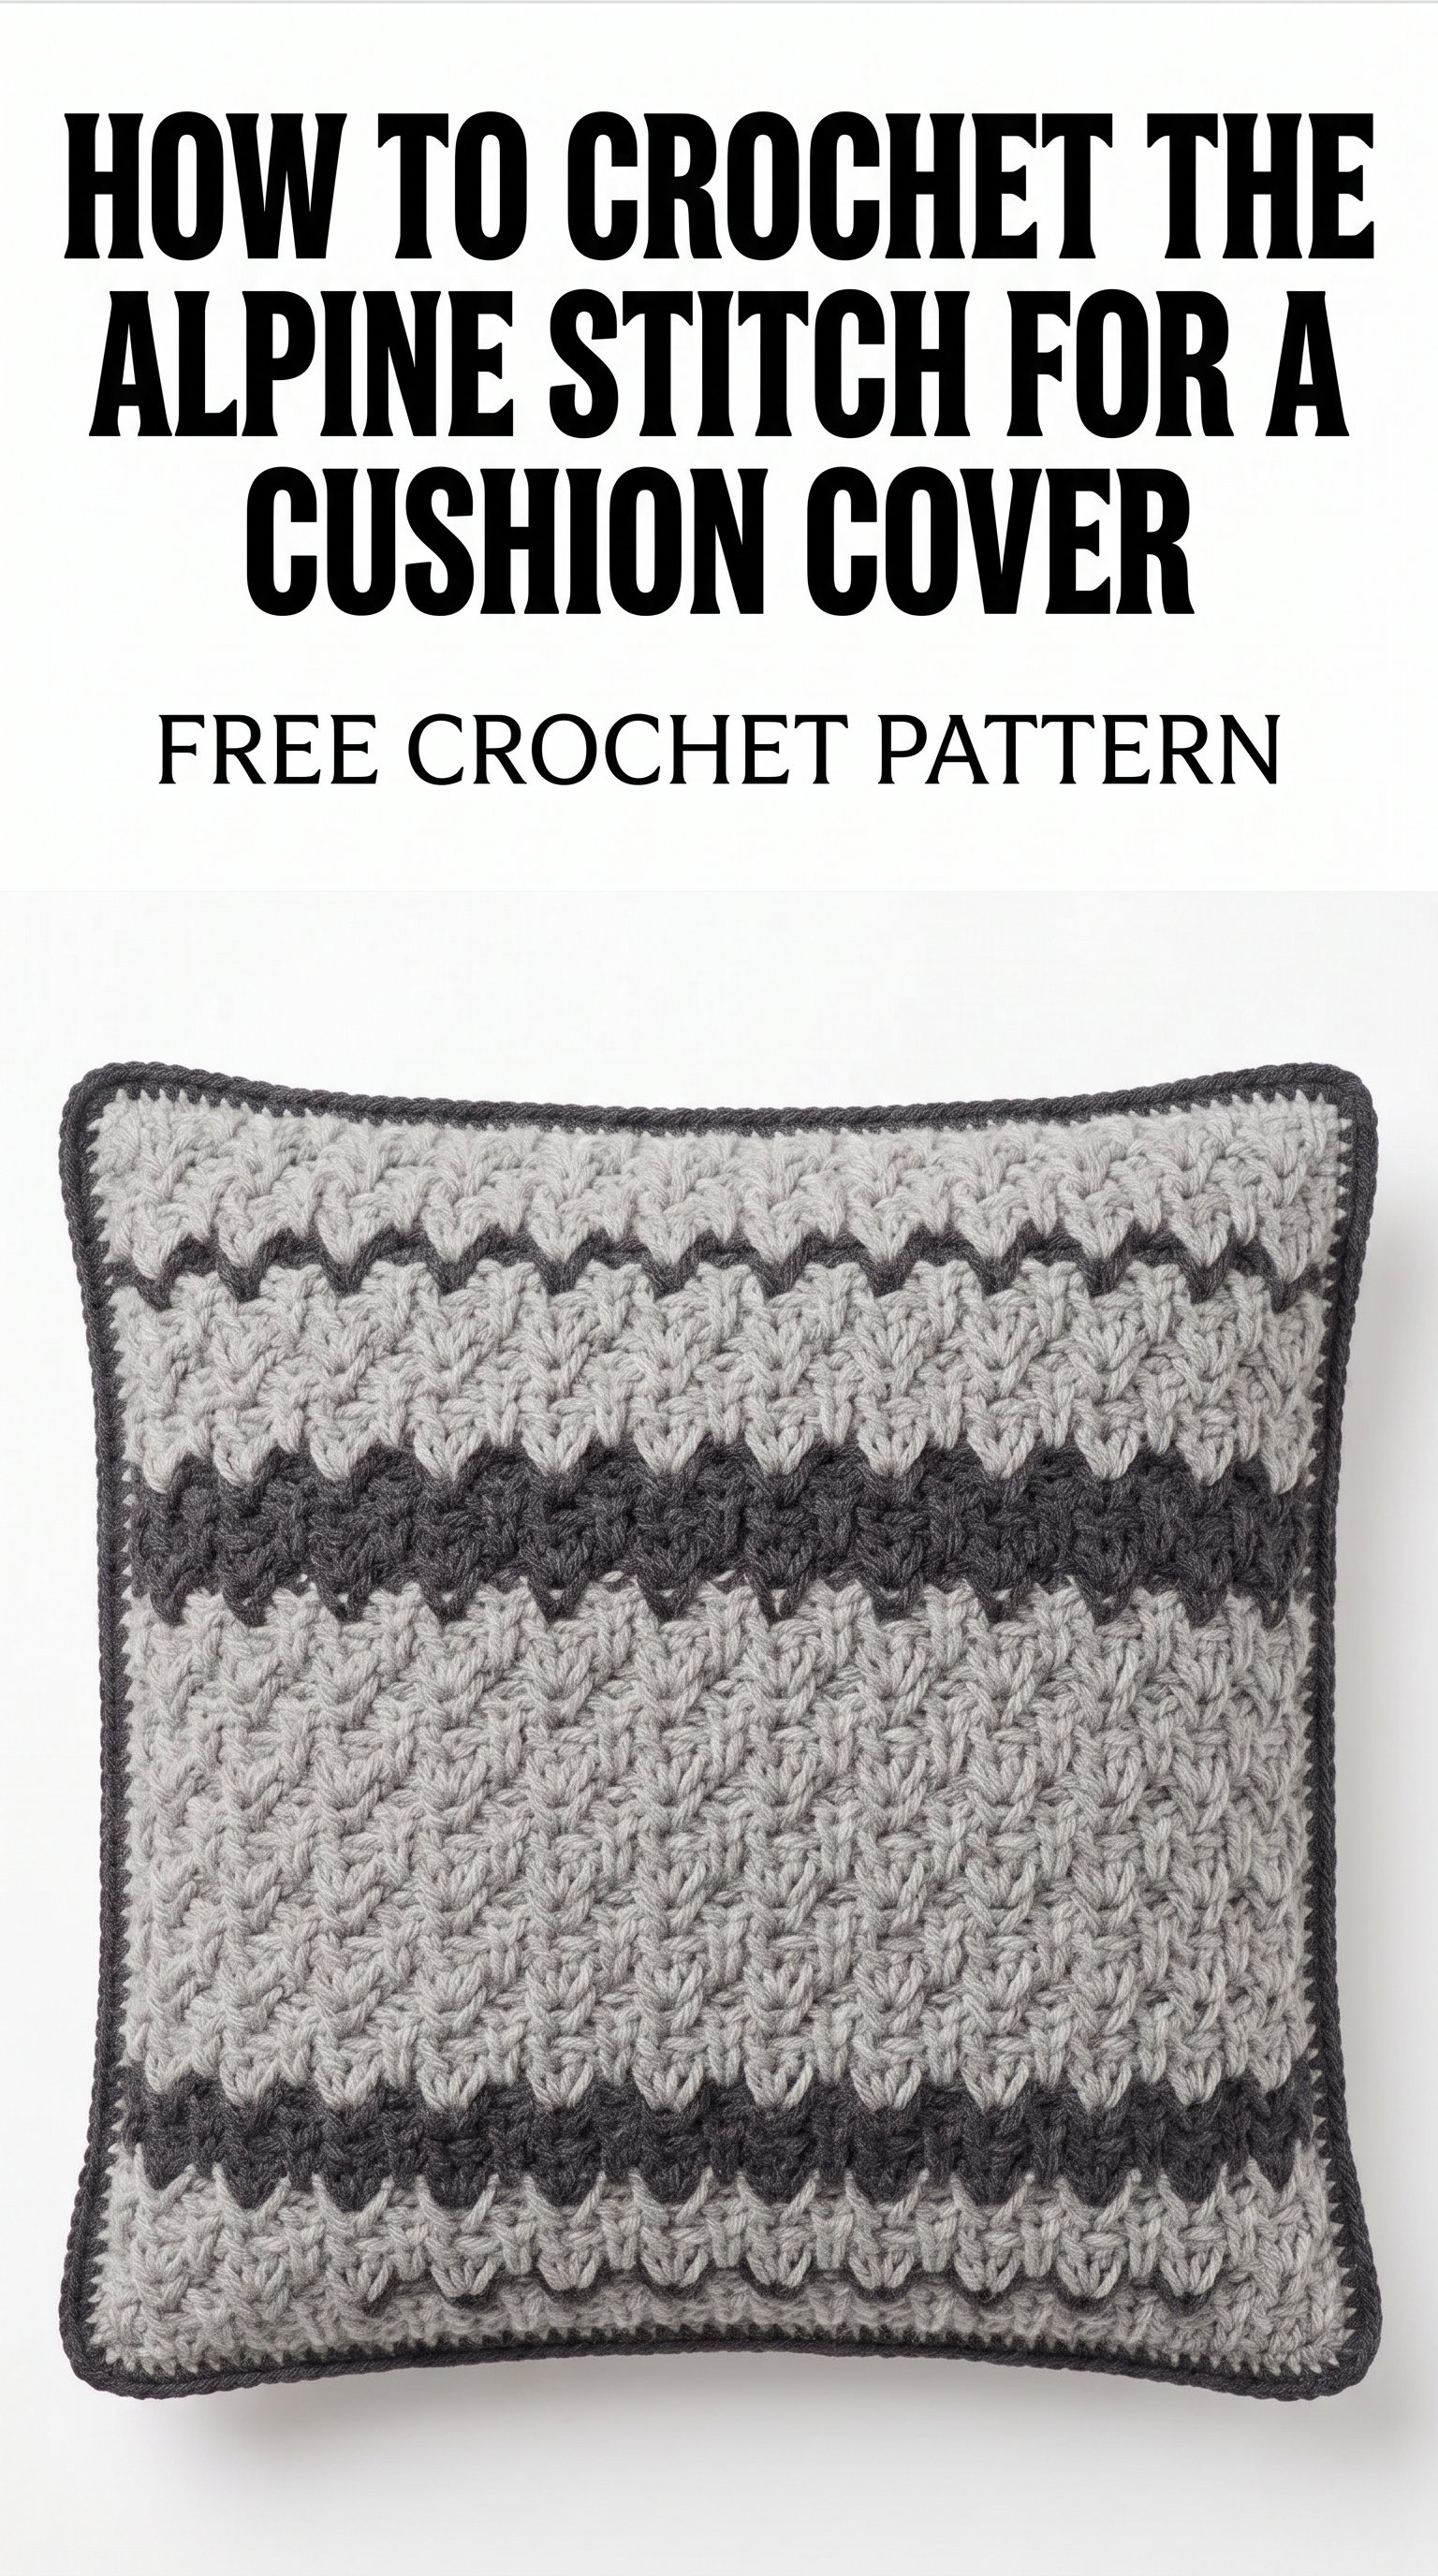
Image shown for inspiration — your finished result may vary slightly.