Crochet Book Sleeve With Built-In Bookmark (The Page Keeper)
Special Stitch: Textured Stitch - To create a textured stitch, you will alternate between a regular double crochet and a front post double crochet (FPDC). - For FPDC, yarn over, insert your hook around the post of the stitch below instead of into the top of the stitch, yarn over and pull through, yo
Published October 5, 2026 · by Lina
- Skill level
- Intermediate
- Yarn weight
- Worsted weight
- Hook size
- 5 mm (H/8)
- Time
- Approximately 3 hours.
- Sizes
- 8" x 10" (20 cm x 25 cm) for standard paperbacks.
INTRO
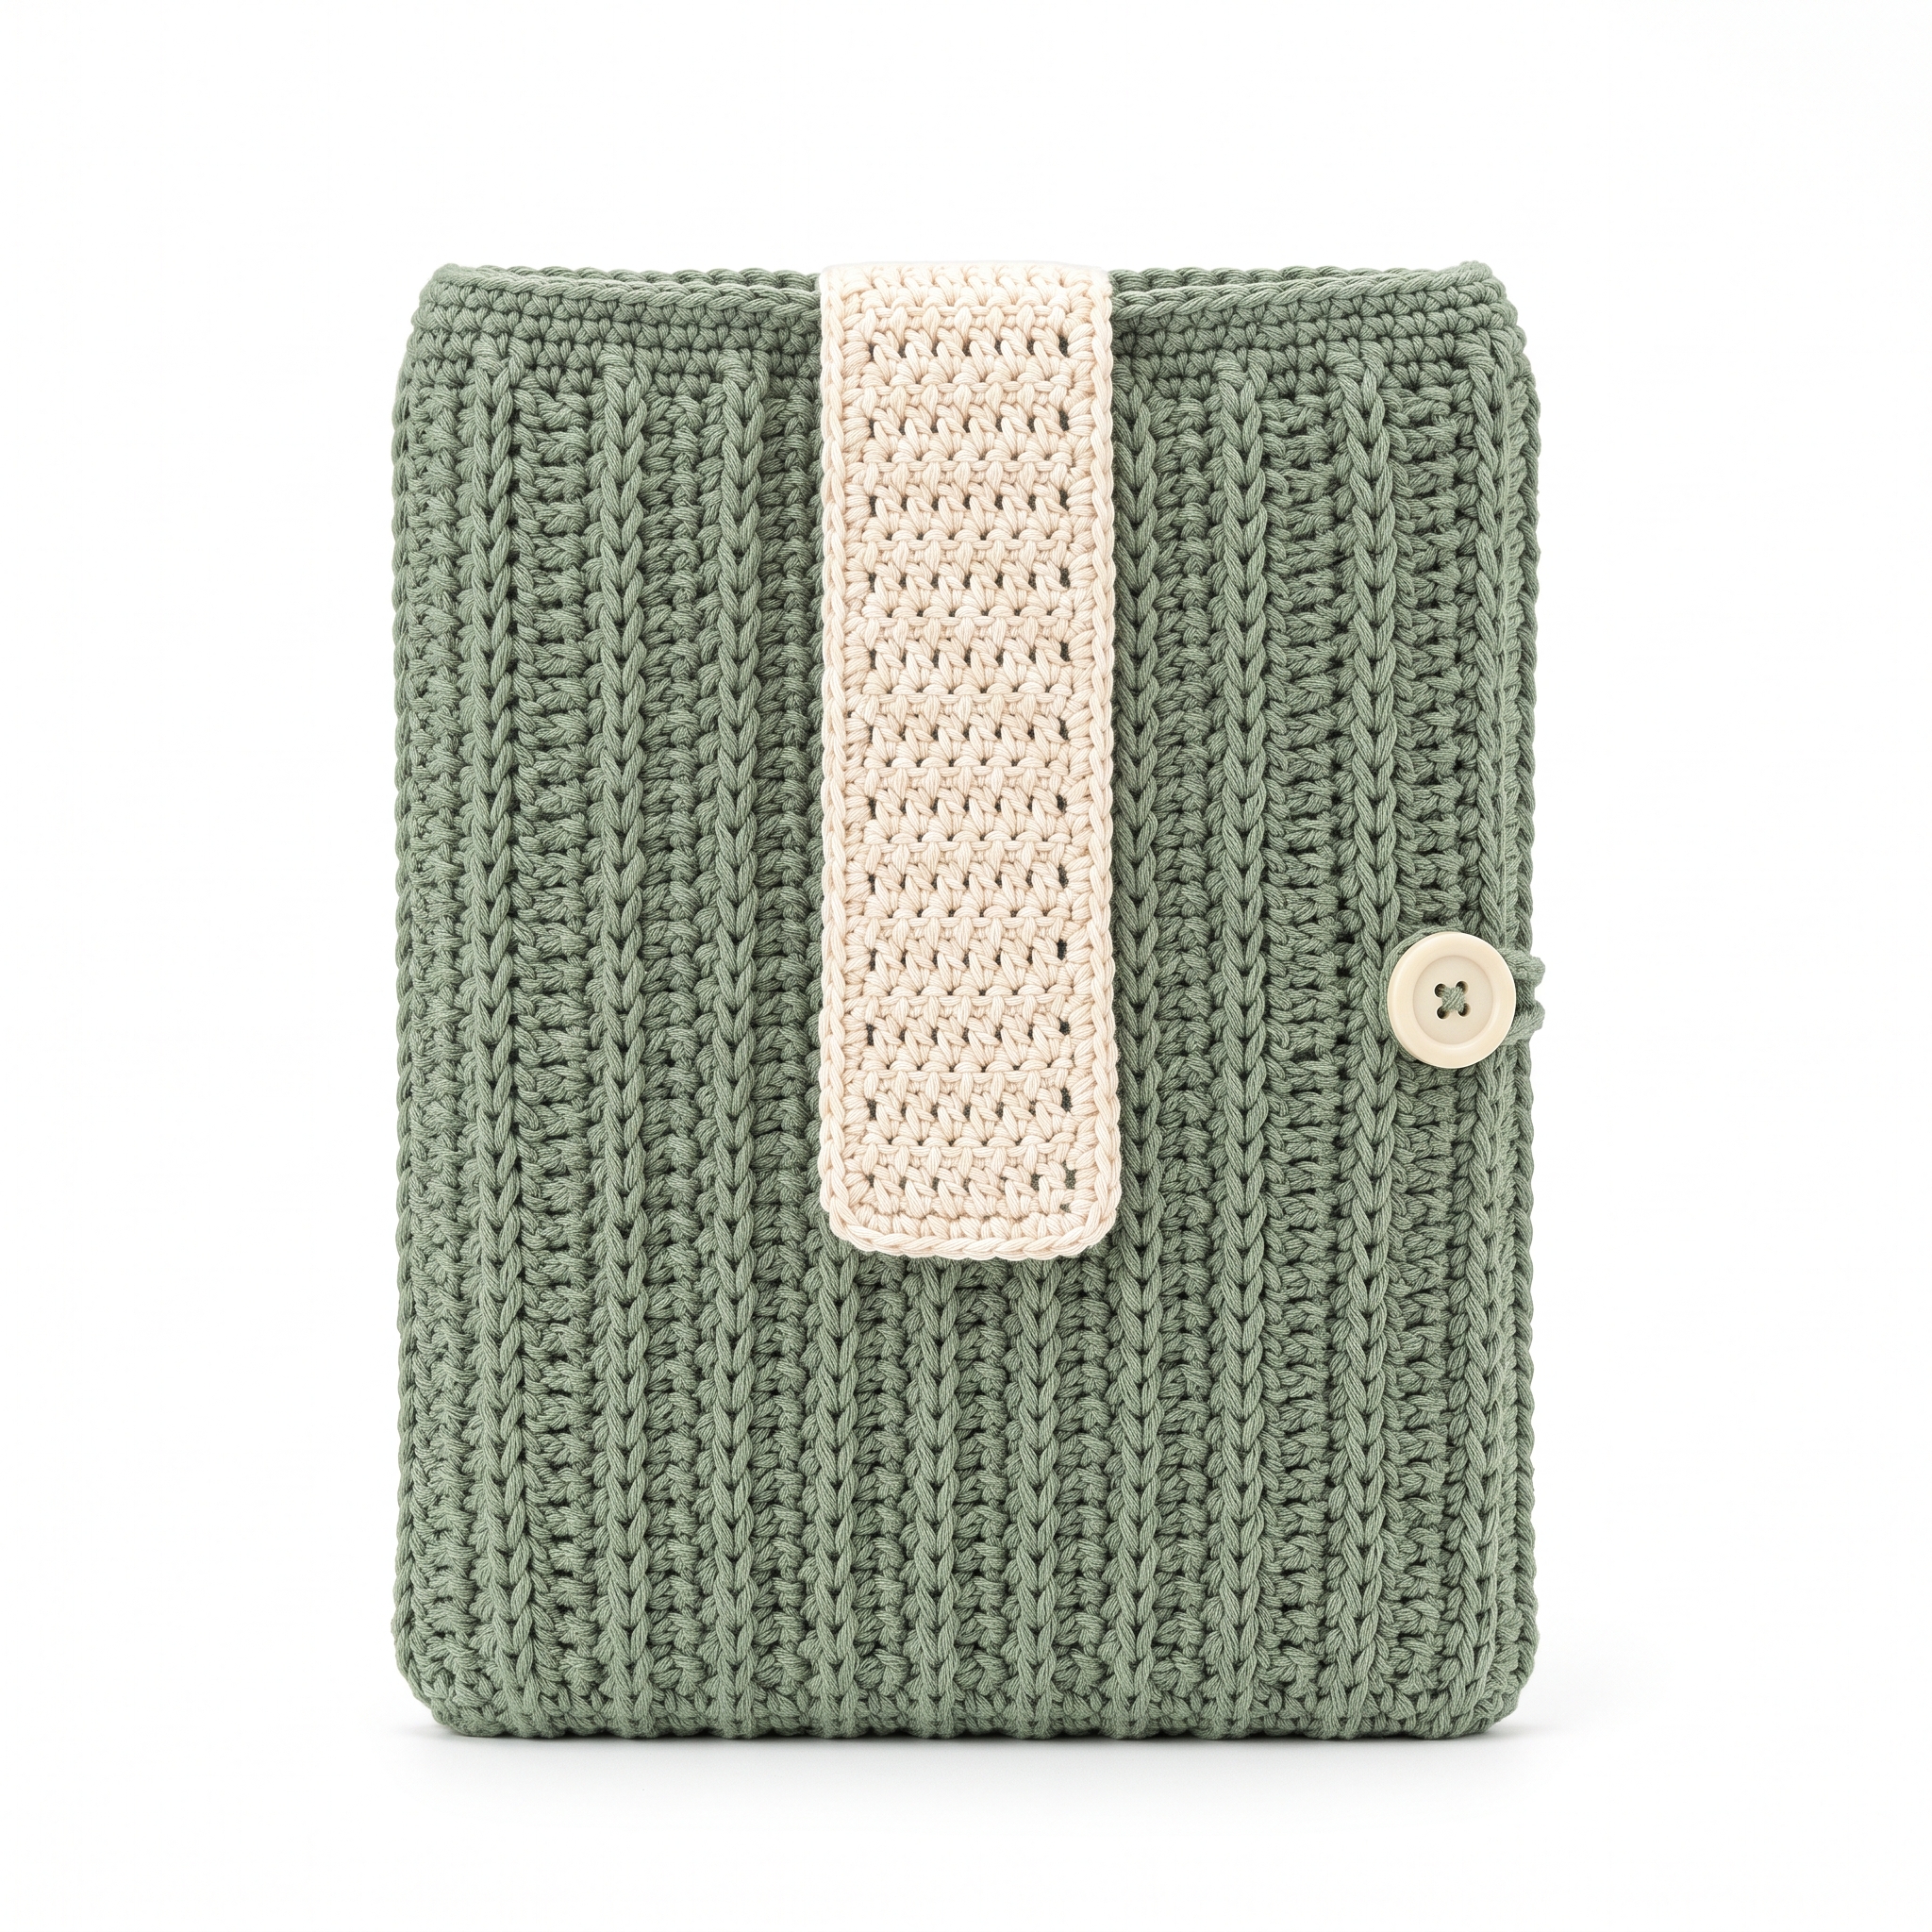
Welcome! Today, we’re going to make a crochet book sleeve that not only protects your favorite books but also includes a built-in bookmark. It’s a fun and beginner-friendly project that’s perfect for gift-giving or keeping your own books organized!
HERO IMAGE PLACEHOLDER
WHY YOU'LL LOVE THIS PATTERN
This pattern is great for beginners who have some basic crochet skills. It can be completed in just a few hours, making it a quick and rewarding project. Plus, you’ll love how useful the built-in bookmark is for keeping your place in the book!
TABLE OF CONTENTS
- What You'll Need
- Stitches You'll Use in This Pattern
- Pattern Details
- Abbreviations
- Special Stitches
- Let's Get Started: Full Pattern Instructions
- Assembly / Putting It All Together
- Finishing
- FULL RECIPE-CARD-STYLE SUMMARY BOX
- What's Next?
What You'll Need
Yarn:
- Worsted weight yarn (#4) — this is a medium-thickness yarn that is easy to see while you crochet.
- 100% cotton yarn in the following colors:
- Color A: Sage Green (approx. 200 yards)
- Color B: Cream (approx. 100 yards)
Crochet Hook:
- 5 mm (H/8) crochet hook — this size is ideal for working with worsted weight yarn.
Stitch Markers (optional but helpful): Use these to mark the beginning of rows to keep your place.
Scissors: To cut your yarn when you finish.
Yarn/Tapestry Needle: This is used for weaving in your loose ends once you finish your project.
1 Button: About 1" in diameter for the closure.
Blocking Mats and Pins (optional): These are used to help shape your finished project if needed.
Stitches You'll Use in This Pattern
Chain (Ch): This creates the starting loops of your project. To make a chain, hold the yarn and pull a loop through the previous loop, repeating until you have the desired number.
Double Crochet (DC): Yarn over (wrap the yarn around your hook), insert the hook into the stitch, yarn over again and pull through (you now have three loops on your hook), yarn over and pull through the first two loops, yarn over again and pull through the last two loops. This makes a tall stitch.
Slip Stitch (Sl St): To do a slip stitch, insert your hook into the stitch, yarn over, and pull the yarn through both the stitch and the loop on your hook.
Single Crochet (Sc): Insert your hook into the stitch, yarn over, pull through (you now have two loops on your hook), yarn over again and pull through the two loops.
Increase (Inc): This means you work two stitches into the same stitch.
Decrease (Dec): This means you work two stitches together as one.
Special Stitch: Textured Stitch
- To create a textured stitch, you will alternate between a regular double crochet and a front post double crochet (FPDC).
- For FPDC, yarn over, insert your hook around the post of the stitch below instead of into the top of the stitch, yarn over and pull through, you’ll have three loops on your hook, yarn over and pull through the first two loops, yarn over and pull through the last two loops.
Pattern Details
Skill Level: Intermediate
Finished Size: 8" x 10" (20 cm x 25 cm) for standard paperbacks.
Time to Complete: Approximately 3 hours.
Yarn Amounts:
- Color A: Sage Green (approx. 200 yards)
- Color B: Cream (approx. 100 yards)
Terms: This pattern uses US crochet terms.
Abbreviations
- Ch = Chain
- DC = Double crochet
- Sl St = Slip stitch
- Sc = Single crochet
- Inc = Increase (2 stitches in one stitch)
- Dec = Decrease (2 stitches worked together as one)
Special Stitches
Textured Stitch
- Row 1: (for textured body)
- DC, FPDC (front post double crochet) in the next stitch; repeat from * to the end of the row, ending with a DC.
This creates a lovely ribbed effect in your sleeve.
Let's Get Started: Full Pattern Instructions
Body of the Sleeve
Round 1
- Foundation Chain: Ch 40 with Color A.
Round 2
- Row 1: DC in the 4th ch from the hook (this counts as your first DC), then DC in each of the next 37 chains. (38 DC)
Round 3
- Row 2: Ch 3 (this counts as your first DC). Then DC in the next 18 stitches.
- Textured stitch: In the next 16 stitches, alternate between DC and FPDC, ending with a DC in the last two stitches. (38 DC)
Round 4-13
- Row 3-12: Repeat Row 2 for 10 more rows. (38 DC)
Round 14
- Row 13: Ch 1 (this does not count as a stitch), Sc across the row. (38 Sc)
Bookmark
Round 15
- Foundation Chain: Ch 20 using Color B.
Round 16
- Row 1: DC in the 4th ch from the hook and in each ch across. (18 DC)
Round 17-26
- Row 2-10: Repeat Row 2. (18 DC)
Round 27
- Finish: Ch 1, turn, Sc across for edging. (18 Sc)
Attaching the Bookmark
- Position the bookmark in the center of the sleeve body, securing it with a few stitches to maintain its position.
Closing the Sleeve
- Fold Sleeve: Fold the sleeve in half, with the right sides facing together.
- Join Sides: Sl St to join the sides together, but keep a 1" gap open at the top so your book can fit in. (38 stitches remained)
Assembly / Putting It All Together
- Button Loop: Create a loop with Color B by chaining 10. Then sl st back to attach it close to the top edge of the sleeve.
- Next, attach the button to the corresponding side of the sleeve for a nice closure.
- Weave in all ends securely using your yarn needle to make sure everything stays in place.
Finishing
Weave in Ends
To weave in your ends, take the yarn needle and thread it. Insert it into the stitches on the inside of your project, hiding the loose ends. This will keep your work neat and tidy.
Blocking (optional)
Blocking is the process of wetting your project and pinning it to shape it. It helps to even out stitches and give your project a polished look. It’s not required for this pattern, but it can be helpful if you want everything to lie flat.
FULL RECIPE-CARD-STYLE SUMMARY BOX
Title: Crochet Book Sleeve With Built-In Bookmark (The Page Keeper)
Yield: 1
One-line description: A stylish crochet book sleeve that also serves as a handy bookmark!
Full materials list:
- Worsted weight yarn (#4) in Color A (Sage Green) and Color B (Cream)
- 1 button (1" in diameter)
- Yarn needle
- Stitch marker (optional)
- Scissors
- Blocking mats and pins (optional)
Full tools list:
- 5 mm (H/8) crochet hook
- Tape measure
Full numbered instructions:
- Ch 40 with Color A.
- DC in the 4th ch from hook, then DC in each ch across. (38 DC)
- Ch 3, DC in the next 18 stitches, then work textured stitch for 16 stitches, DC in last 2 stitches. (38 DC)
- Repeat Row 2 for 10 more rows. (38 DC)
- Ch 1, Sc across. (38 Sc)
- Ch 20 using Color B.
- DC in the 4th ch from hook, and in each ch across. (18 DC)
- Repeat Row 2 for 9 more rows. (18 DC)
- Ch 1, turn, Sc across for edging. (18 Sc)
- Secure bookmark in center of sleeve body.
- Fold sleeve in half and Sl St to join, leaving a 1" gap at top. (38 stitches)
- Create button loop and attach button.
Notes:
- Ensure your tension is uniform and gauge is correct for best fit.
- Customize with different colors if desired!
What's Next?
Save this for later: Don’t forget to save this pattern to Pinterest so you can find it again easily!
Leave a comment: If you have any questions or need help with a step, feel free to ask! All questions are welcome!
Share your finished project: I’d love to see your beautiful book sleeves! Share your project proudly, no pressure at all! Happy crocheting!
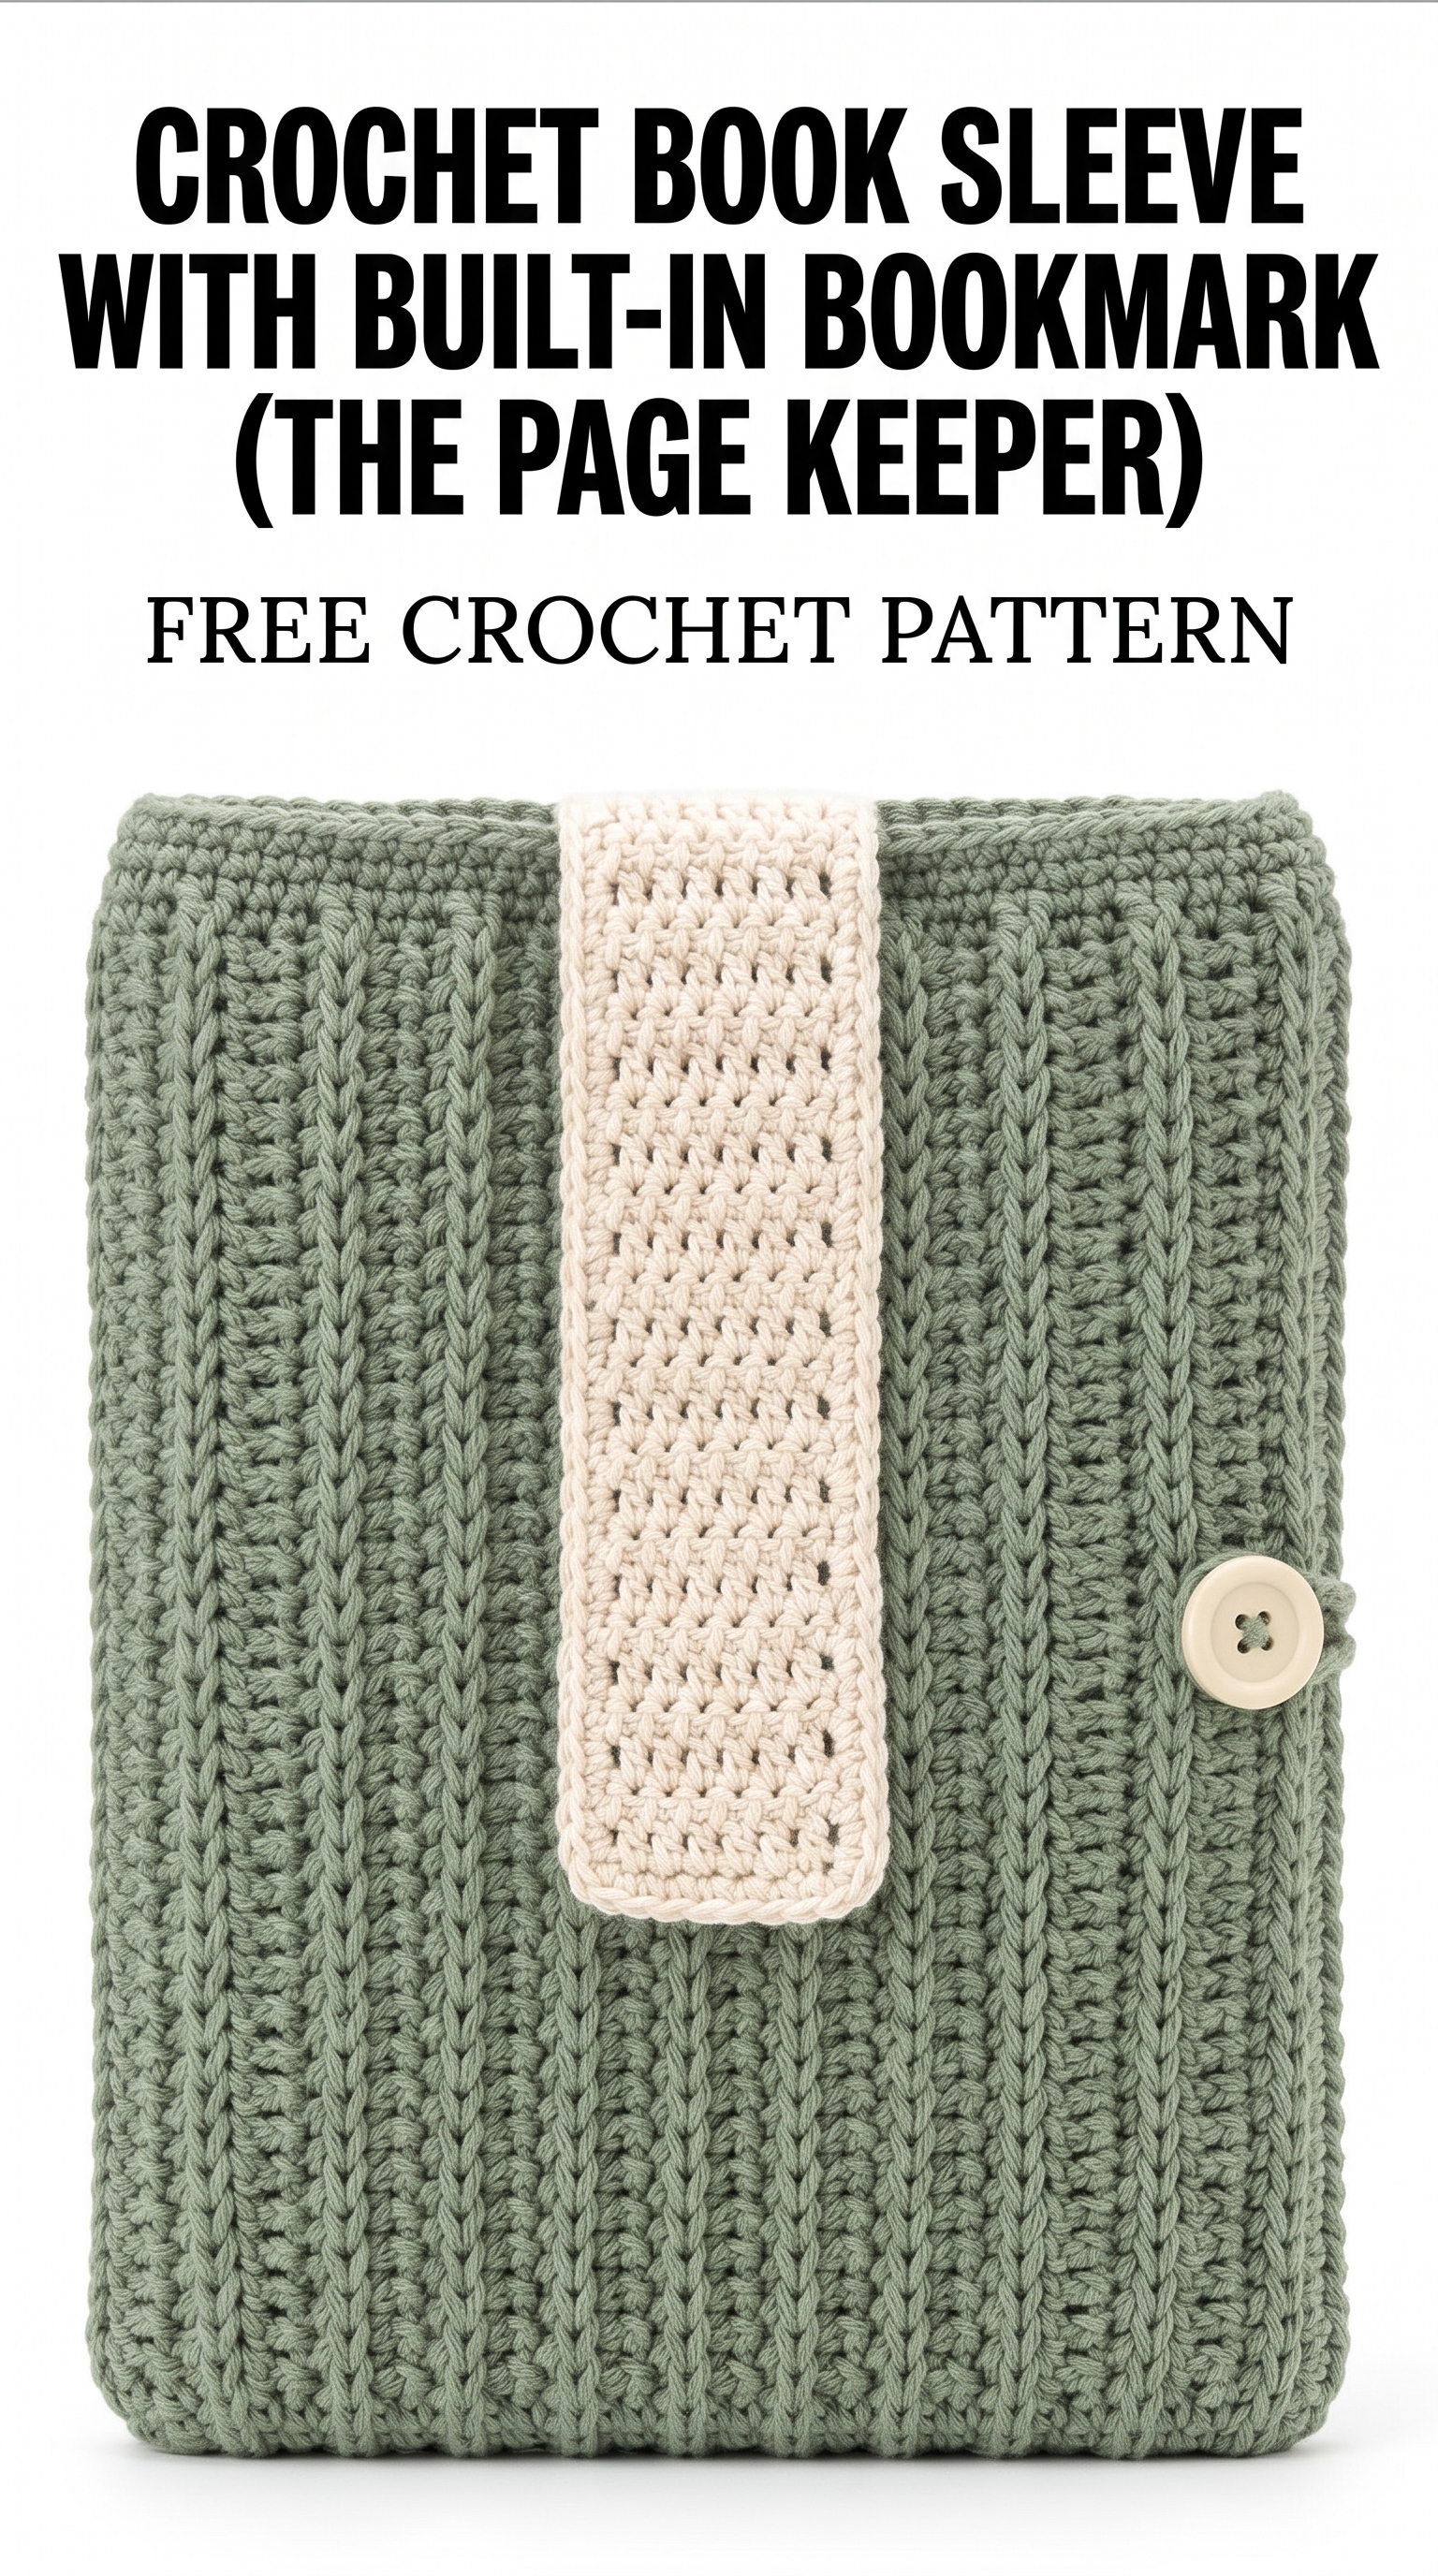
Image shown for inspiration — your finished result may vary slightly.