How to Crochet a Bedside Caddy – Easy Pattern for Beginners
Welcome! Today, I’ll walk you through making a delightful Crochet Bedside Caddy that is perfect for storing your favorite books and glasses. This project is beginner-friendly and a fun way to add a personal touch to your space. You’ll love how functional it is!
Published October 5, 2026 · by Lina
- Skill level
- Beginner
- Yarn weight
- Worsted weight
- Hook size
- 5.0 mm (H-8)
- Time
- Approx. 4 hours
- Sizes
- Approximately 12 inches wide x 16 inches tall (30 cm x 40.5 cm)
Welcome! Today, I’ll walk you through making a delightful Crochet Bedside Caddy that is perfect for storing your favorite books and glasses. This project is beginner-friendly and a fun way to add a personal touch to your space. You’ll love how functional it is!
HERO IMAGE PLACEHOLDER
WHY YOU'LL LOVE THIS PATTERN
This pattern is great for beginners because it uses simple stitches and techniques. You can create this caddy in just a few hours! Plus, it’s a fantastic way to keep your bedside organized.
TABLE OF CONTENTS
- What You'll Need
- Stitches You'll Use in This Pattern
- Pattern Details
- Abbreviations
- Special Stitches
- Let's Get Started: Full Pattern Instructions
- Assembly / Putting It All Together
- Finishing
- FULL RECIPE-CARD-STYLE SUMMARY BOX
- What's Next?
What You'll Need
Yarn:
- Worsted weight (4) — this is a medium-thickness yarn that is easy to see your stitches with.
- Colors:
- Light Blue (approx. 200 yards) — used for the caddy body and optional edging.
- Cream (approx. 100 yards) — used for pockets and optional buttonhole.
Crochet Hook:
- 5.0 mm (H-8) hook – this size works best for the yarn and creates a nice tension.
Stitch Markers (optional but helpful): These keep track of your rows and stitches.
Scissors: To cut your yarn when you finish.
Yarn/Tapestry Needle: This needle is needed to weave in ends and sew parts together.
Stuffing (if applicable): Not needed for this project, as it's a flat caddy.
Safety Eyes (if applicable): Not needed for this project.
Stitches You'll Use in This Pattern
Chain (ch): This creates the loops to start your work.
- To do this, make a slip knot on your hook, then yarn over (wrap yarn over the hook) and pull through the loop on your hook. Repeat to make chains.
Double Crochet (dc): This makes a tall stitch, giving your caddy height.
- Yarn over, insert your hook into the stitch, yarn over again, pull through so you have three loops on your hook. Yarn over and pull through the first two loops. Yarn over again and pull through the last two loops.
Single Crochet (sc): This stitch gives a tighter texture.
- Insert your hook into the stitch, yarn over, pull through so you have two loops on your hook. Yarn over again and pull through those two loops.
Slip Stitch (sl st): This is used to join stitches or rounds.
- Insert your hook into the stitch, yarn over, and pull through both loops on the hook.
Skip (sk): This means to leave a stitch unworked.
Increase (inc): This means to make two stitches in the same stitch.
Bind Off (BO): This is used to finish your project and stop it from unraveling.
Pattern Details
- Skill Level: Beginner
- Finished Size: Approximately 12 inches wide x 16 inches tall (30 cm x 40.5 cm)
- Time to Complete: Approx. 4 hours
- Yarn Amounts:
- Light Blue: 200 yards
- Cream: 100 yards
- Terms: This pattern uses US crochet terms.
Abbreviations
- ch = chain
- dc = double crochet
- st = stitch
- sl st = slip stitch
- sc = single crochet
- sk = skip
- inc = increase (2 stitches in the same stitch)
- BO = bind off
Special Stitches
None required for this pattern. All techniques used are covered in the previous sections.
Let's Get Started: Full Pattern Instructions
Body
Foundation Row
- Ch 32. This will create the base of your caddy.
Row 1
- Dc in the 4th ch from hook and in each ch across. (30 sts)
- Start counting from the first chain where your hook is.
Rows 2-20
- Ch 3 (this counts as your first dc), turn your work, and dc in each st across. (30 sts)
- Do this until your piece measures 16 inches tall.
Row 21
Ch 1, sc in each st across for a neat finishing edge. (30 sts)
Fasten off and weave in ends.
- Pull the yarn through the last loop and cut it to secure. Use your tapestry needle to hide the loose yarn ends.
Pockets
First Pocket
Using Cream yarn, Ch 20.
- This will create the base of the first pocket.
Dc in the 4th ch from hook and in each ch across. (18 sts)
- Remember to count the skipped chains!
Rows 1-5
Ch 3, turn, dc in each st across. (18 sts)
- Repeat this step for 5 rows in total.
Fasten off, leave a long tail for sewing.
Second Pocket
Using Light Blue yarn, Ch 20.
- This will create the base of the second pocket.
Dc in the 4th ch from hook and in each ch across. (18 sts)
- Just like the first pocket!
Rows 1-5
Ch 3, turn, dc in each st across. (18 sts)
- Again, do this for 5 rows total.
Fasten off, leave a long tail for sewing.
Assembly
Positioning Pockets
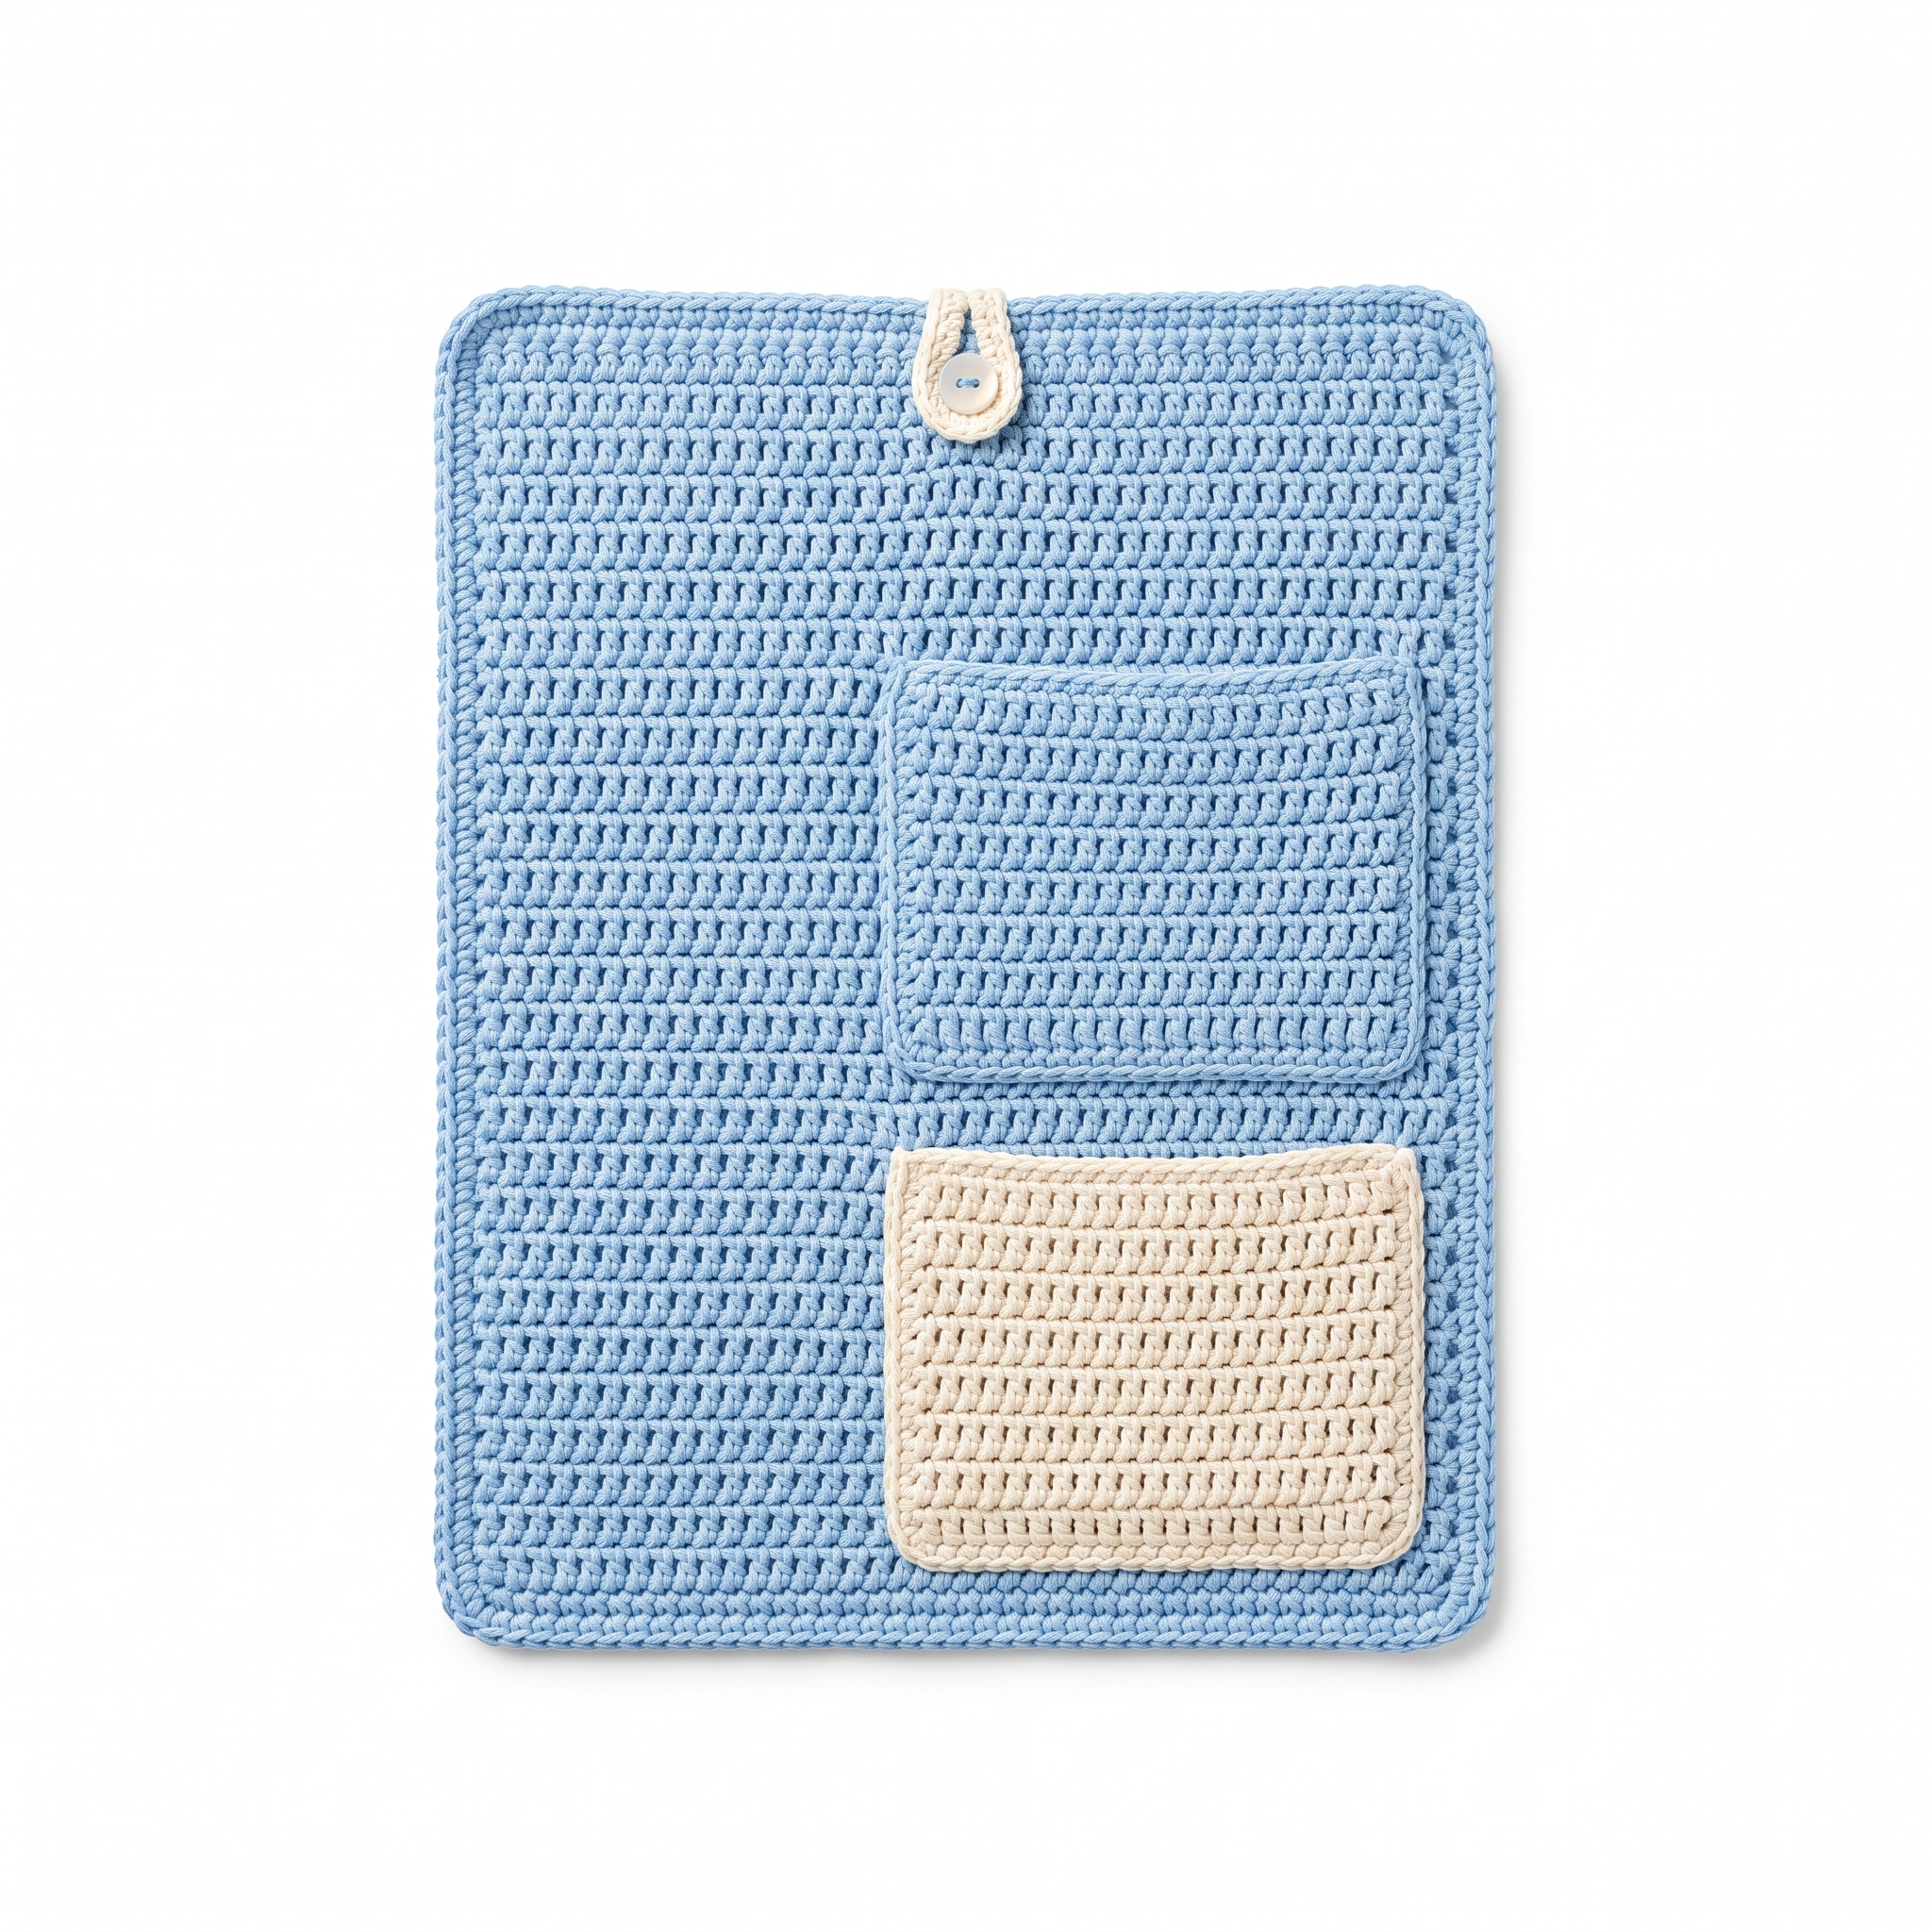
Position the first pocket on the bottom right side of the main body about 3 inches from the bottom edge.
- Use your tapestry needle to sew it into place.
Position the second pocket above the first pocket and sew it into place.
- Ensure there is about 1 inch between the pockets for easy access.
Edging (Optional)
- Work a round of sc around the edges of the caddy using Light Blue yarn to finish the edges evenly.
- To complete the round, join with a sl st to the first sc and fasten off.
Buttonhole (Optional)
- For closure, attach Cream yarn at the top of the caddy, chain 10, and sc in the 3rd ch from hook.
- Continue with sc across the remaining chains and finish off.
Finishing
Weave in Ends
- To weave in the ends, thread the tapestry needle with your leftover yarn. Insert the needle through the stitches at the back side of the work and pull it through a few stitches to hide it. Trim excess yarn.
Blocking (optional)
- Blocking is when you dampen your finished piece and shape it to enhance its appearance. Lay your caddy flat and pin it to the desired dimensions. Once dry, it holds its shape nicely!
FULL RECIPE-CARD-STYLE SUMMARY BOX
- Title: Crochet Bedside Caddy
- Yield: 1
- One-line description: A convenient caddy for storing books and glasses beside your bed.
- Full materials list:
- Worsted weight yarn (Light Blue, approx. 200 yards; Cream, approx. 100 yards)
- 5.0 mm (H-8) crochet hook
- Tapestry needle
- Scissors
- Stitch markers (optional)
- Full numbered instructions:
- Ch 32
- Dc in the 4th ch from hook and in each ch across. (30 sts)
- Ch 3, turn, dc in each st across for Rows 2-20. (30 sts)
- Ch 1, sc in each st across. (30 sts)
- Fasten off and weave in ends.
- For first pocket, using Cream yarn, ch 20, dc in 4th ch from hook and across. (18 sts)
- Ch 3, turn, dc across for Rows 1-5. (18 sts)
- Fasten off, leave a long tail for sewing.
- For second pocket, using Light Blue yarn, repeat steps 6 to 8.
- Sew pockets onto body.
- Optional: work a round of sc around edges with Light Blue yarn and fasten off.
- Optional: make a buttonhole with the Cream yarn if desired.
- Notes: For a larger caddy, increase the foundation chain in multiples of 3.
What's Next?
Save this for later: Don’t forget to save this post on Pinterest so you can come back to it easily!
Leave a comment: If you have any questions or need help, feel free to ask. I’m here to support you!
Share your finished project: I would love to see your beautiful caddy! Feel free to share your creations whenever you’re ready. Happy crocheting!
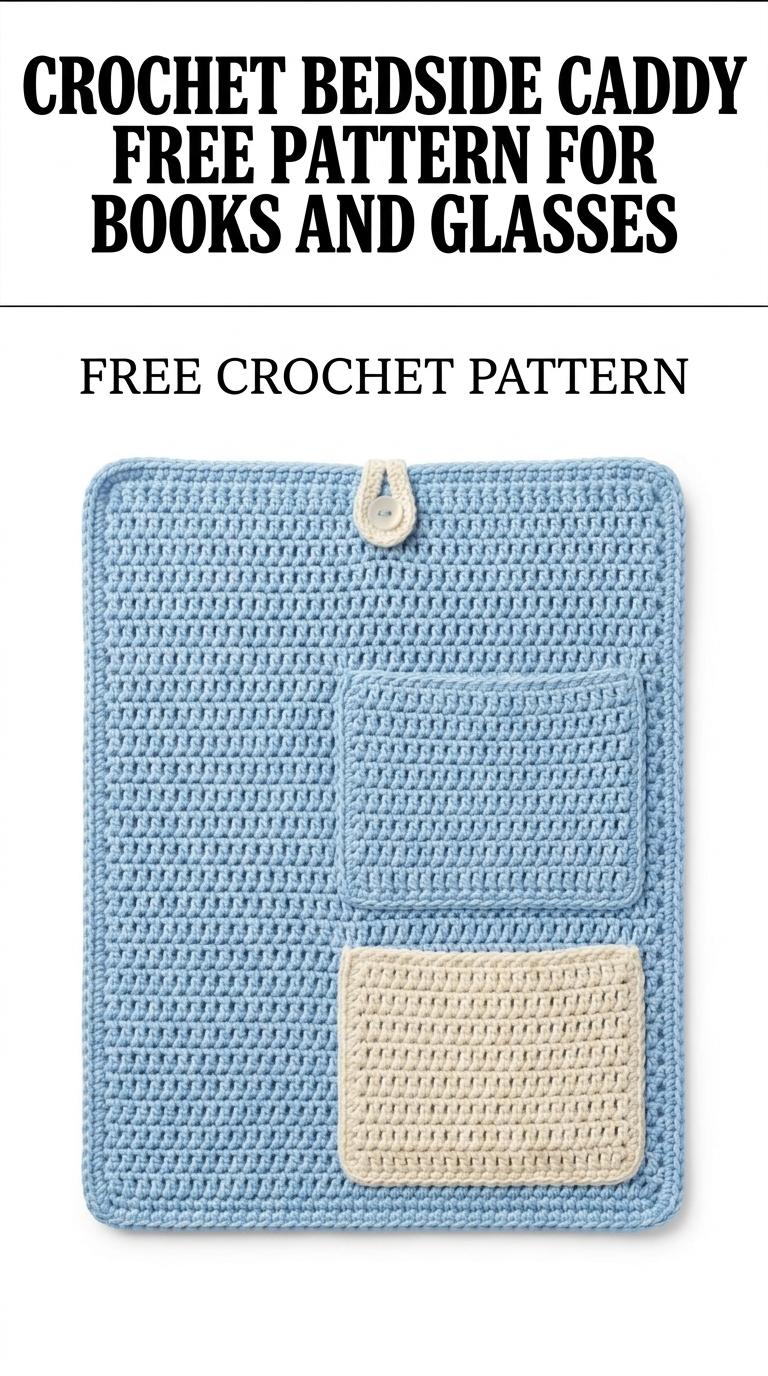
Image shown for inspiration — your finished result may vary slightly.